Resources Index
-
Design Ventura 2023-24 Webinars
Our webinars feature designers at various stages in their careers, speaking about their work and offering top tips for each stage of the Design Ventura project. They are suitable for teachers and students. Here are our 4 webinars from this year:
Webinar 1 with Sophie Puffett.
Webinar 2 with Rob Earl-Ocran.
Webinar 3 with Loki Xu.
Webinar 4 with Rachel Glinsman.
-
Brief Setter for 2023-24: Kangan Arora
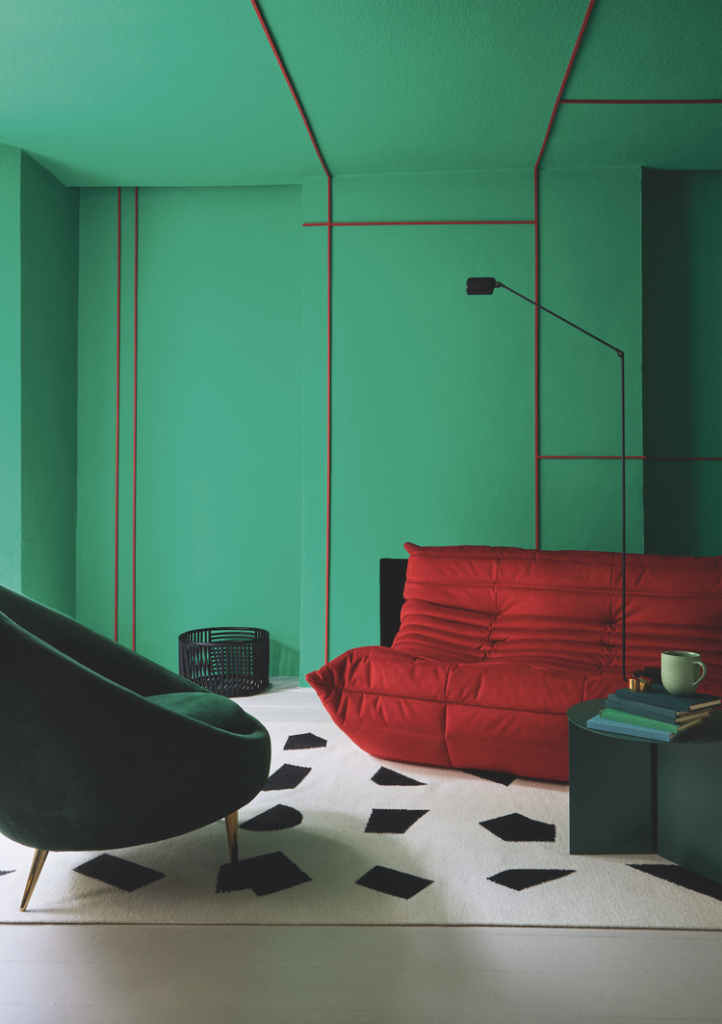
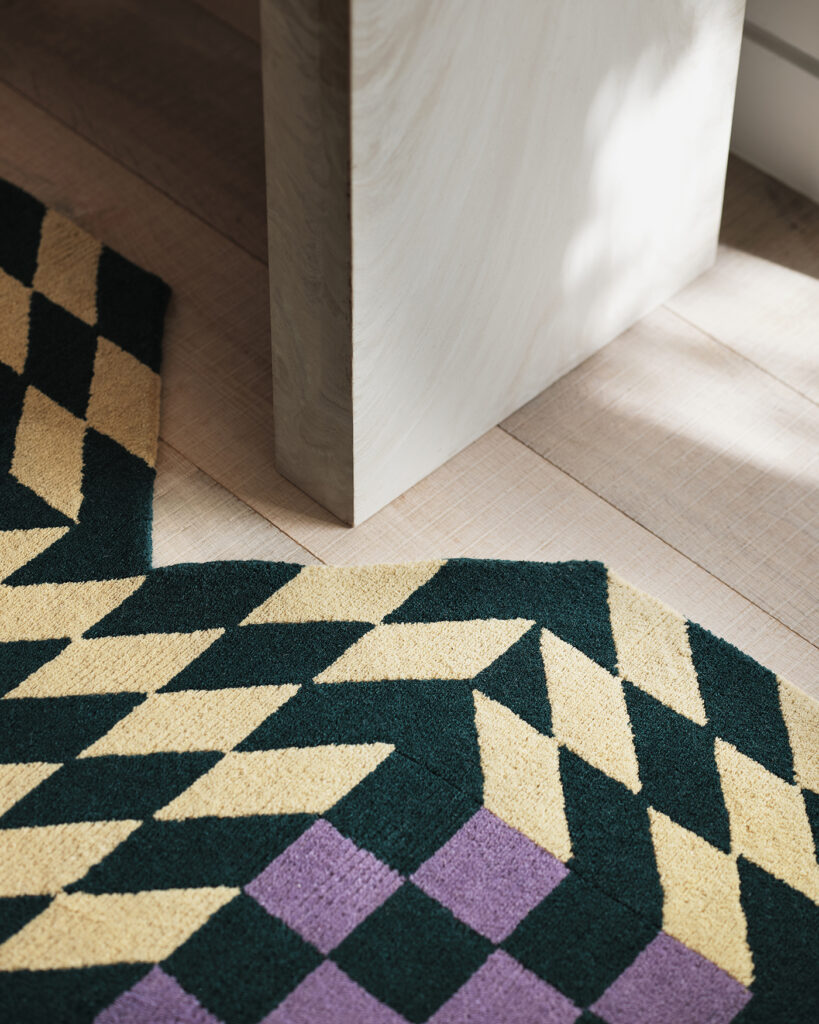
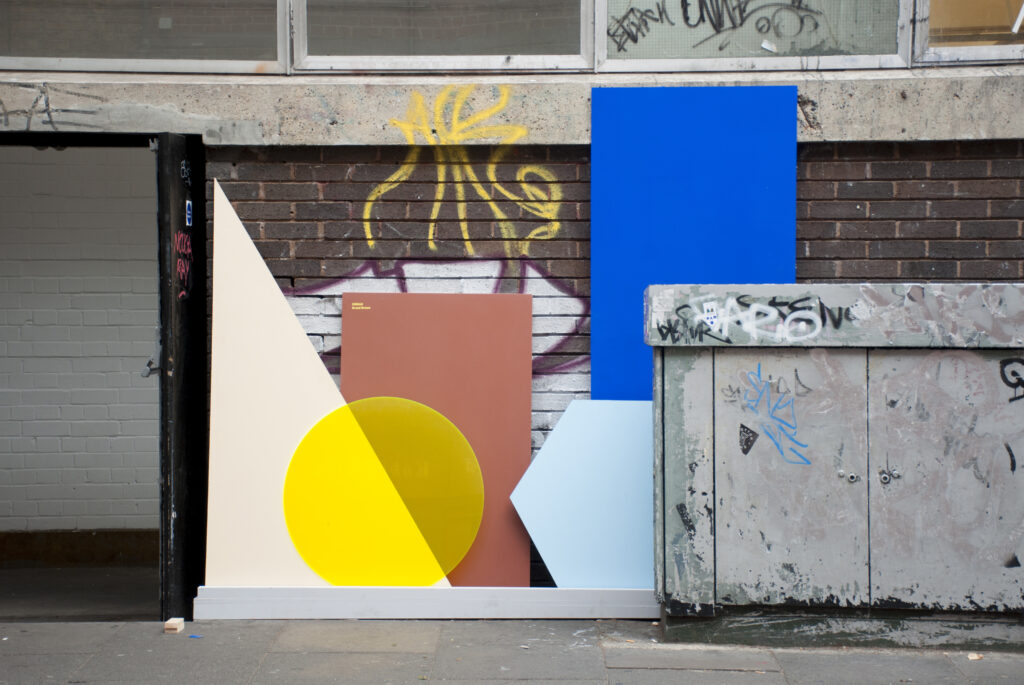
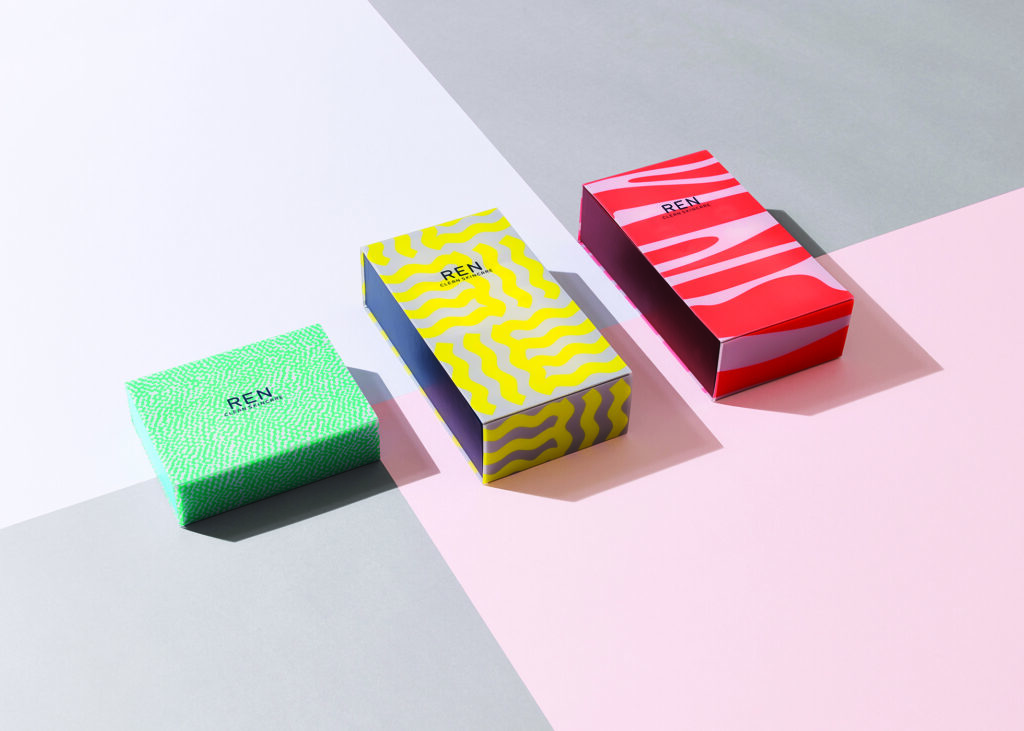
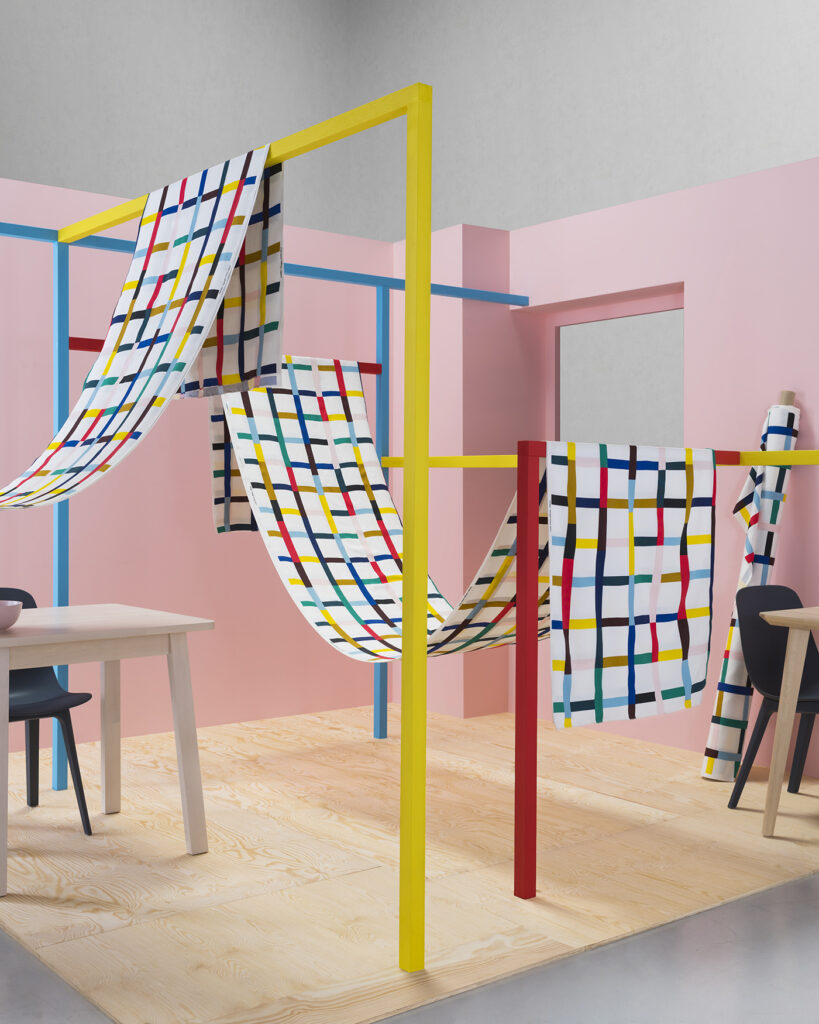
We are excited to announce that the Design Ventura 2023-24 brief setter is Kangan Arora, a South London-based designer specialising in textiles, though she has designed everything from websites to chocolate packaging!

Kangan Arora, photo credit Taran Wilkhu @taranwilkhu Kangan works with and is inspired by communities across the world, from her students and colleagues at Central Saint Martins College of Art and Design, to her fellow creatives and design experts with whom she staged an exhibition in Japan in 2020. Her favourite source of inspiration is the rainbow of colours, geometries, and pattern applications of the Indian visual vernacular.
While her patterns are often abstract, Kangan is a designer, so her work is rooted in the practical – she constantly collects and experiments with different pigments and print processes. With so much to draw on it’s no surprise that she has designed a huge range of products including soft furnishings, acoustic panels, and socks. She has also worked with a variety of brands and institutions including TATE, Heal’s, Floor_Story, and IKEA.

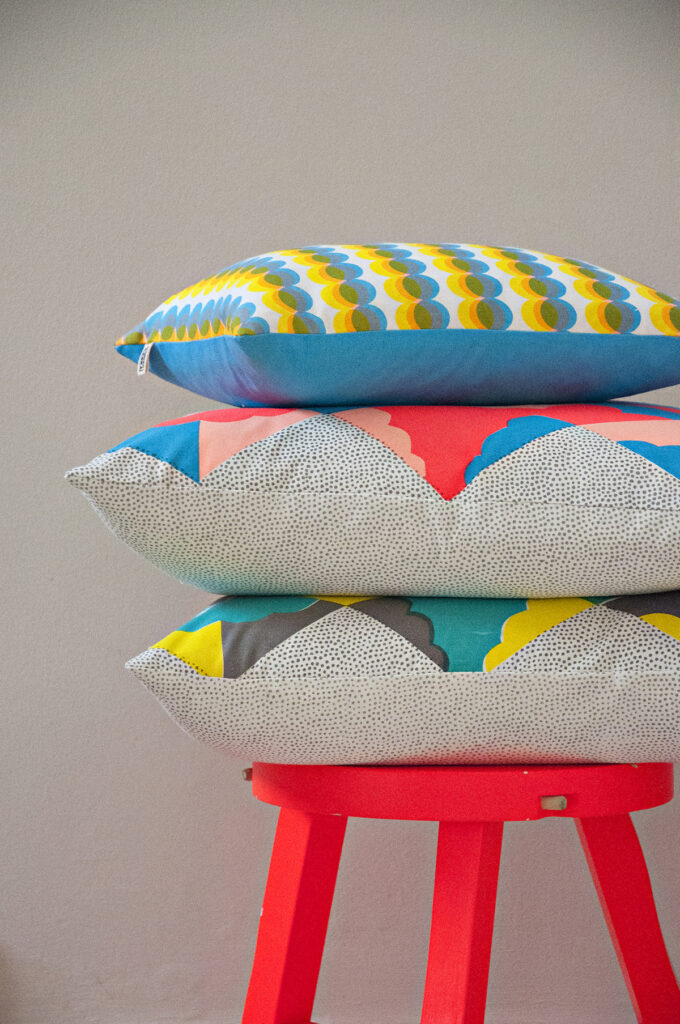
Two things are central to Kangan Arora’s work: colour and community. That’s why this year’s Design Ventura brief asks you to draw on one or both of these themes when designing your product for the competition. Watch the video below to find out more about Kangan’s work and the Design Ventura brief:
Even though Kangan’s work covers a huge range of product types, she always has a unique and identifiable personal style. We suggest that for your own project, you start by thinking about how colour and community are present in your own life – this will ensure that your ideas are grounded and original. From here, we encourage you to unleash your creativity. Seek out other designers who incorporate colour and community in their work. You might be surprised how many different ways these themes can be incorporated!
Don’t forget to think about all aspects of your product: how it looks, feels, and functions. You could take inspiration from Kangan Arora’s portfolio of packaging and branding designs for ideas on how to present your product as it deserves, in a way that will appeal to your chosen target market.
Kangan is a lecturer at Central Saint Martins, which is part of the University of London, so she knows how to help students get creative. Watch the video below for some of her top tips when producing your design, from idea generation to final pitch:
We are thrilled to welcome Kangan Arora to Design Ventura this year. As well as setting your brief, she will be one of our expert judges, helping to choose this year’s winning idea at the Pitching Day in March 2024. We can’t wait to see your ideas!
-
Design Ventura 2022-23 Webinars
Design Ventura webinars are for teachers and students. They feature leading designers speaking about their work and offering top tips for each stage of the Design Ventura project. You can watch all four webinars from this year’s programme below:
Webinar 1: User Research and Audiences with Designer, Imran Nazerali.
Webinar 2: Sustainable Materials with Maria Giovanna Sandrini from Econyl.
Webinar 3: Business of Design with Alex Asomuyide, Head of UX Credit Risk at Deutsche Bank.
Webinar 4: Creative Process with Yamuna Forzani
-
Design Ventura 2022-23 Brief Setter: Selasi Setufe MBE
We are pleased to announce that the Design Ventura 2022-23 brief setter is artist and designer Selasi Setufe.
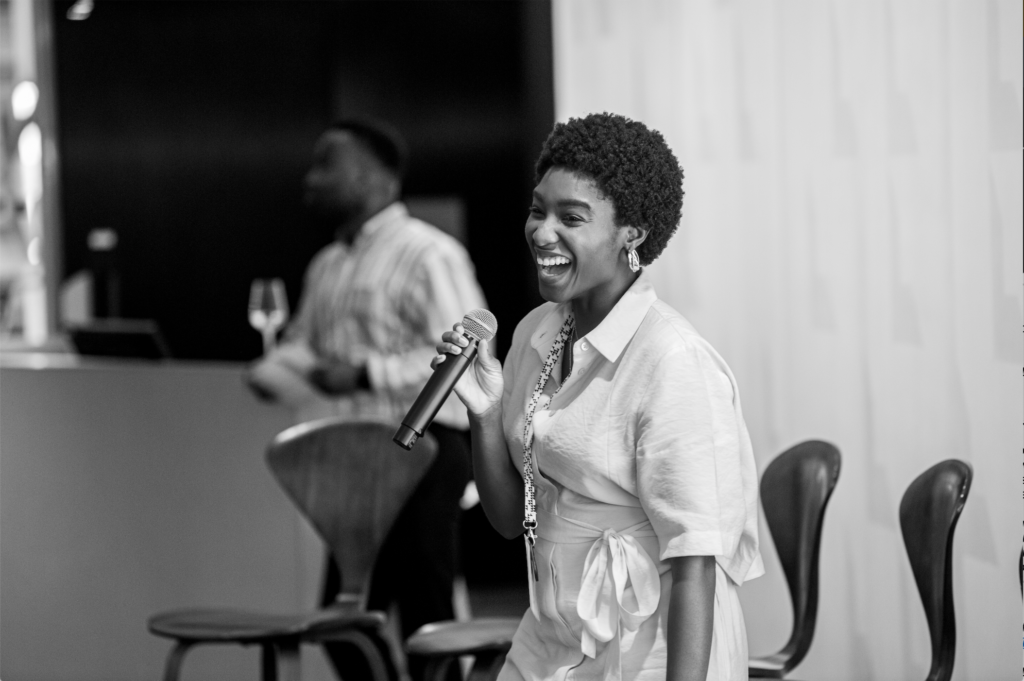
Selasi Setufe, Photo credit Julian George @chefsignatures @madebyhumansstudio Selasi Setufe is an architect with an interest in exploring socially responsive approaches to design, architecture and placemaking. She is co- director of Black Females in Architecture, an organisation which advocates for diversity, race and gender equity in Architecture, Design & Construction industries.
You can find out more about her work and the Design Ventura brief, by watching the brief video below:
She currently works as senior architect and innovative sites manager at Be First this year, students are challenged to design a product for the Design Museum Shop, inspired by the theme of ‘Place’.
“I have a particular interest in the impact that the places around us have on influencing our societies and environments. As an Architect, I have the pleasure of positively contributing to shaping spaces we live, work and play in. I am really excited to see how thoughts about ‘Place’ in all its different meanings are explored by the students taking part in this year’s Design Ventura programme, and I can’t wait to see the products they come up with. The first time I considered a career in design was whilst I was at secondary school and I hope the Design Ventura experience will inspire a new generation of designers and entrepreneurs.” Selasi SetufeSelasi is interested in exploring socially responsive approaches to design, architecture and placemaking, with particular focus on cultural and environmental issues. The outcome of her work is varied and comes in multiple forms.
Selasi along with fourteen other practices were invited to create a paper model to sit on top of the cases in the V&A’s Architecture Gallery. These new models sit in dialogue with those underneath, building on this history to project into the future.
You can watch Sealsi’s top tips for students taking part in Design Ventura competition in the video below:
We are delighted that Sealsi will be one of our expert judges, helping to choose this year’s winning idea at the Pitching Day in March 2023.
-
Design Ventura 2021-22 Webinars
Design Ventura webinars are for teachers and students. They feature leading designers speaking about their work and offering top tips for each stage of the Design Ventura project. You can watch all four webinars from this year’s programme below:
Webinar 1: Audiences with Resolve Collective
Akil Scafe-Smith, Designer and Co-Founder of Resolve Collective talks about audiencesWebinar 2: Coming up with Ideas with Fixperts
Daniel Charny, Co-Founder and Creative Director of Fixperts talks about coming up with ideasWebinar 3: Prototyping & Materials with Helen Kirkum Studio
Sustainable sneaker designer Helen Kirkum talks about prototyping and materialsWebinar 4 – Colour & Communication with The Fandangoe Kid
Annie Nicholson, aka The Fandangoe Kid, talks about colour and communicationPlease share these videos with your students and please take a moment to give us your feedback here.
-
Meet the Design Ventura 2021 Brief Setter – Yuri Suzuki
We are pleased to announce that the Design Ventura 2021-22 brief setter is artist and designer Yuri Suzuki.
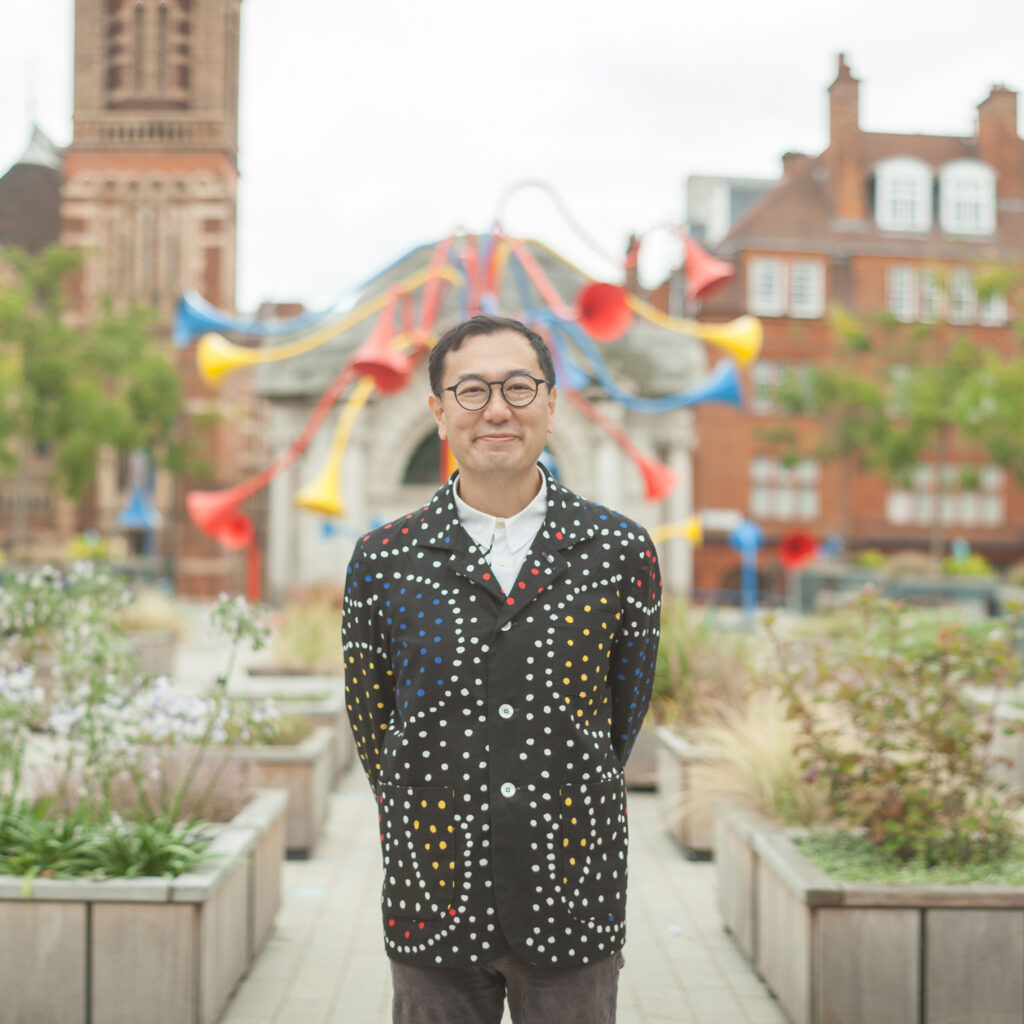
Yuri Suzuki, Photo Credit: Alberto Balazs Yuri Suzuki is a sound artist, designer and electronic musician. He is Partner at design firm Pentagram and works out of studios in London and Margate. His work ranges from small products to large scale installations. His practice uses sound and interaction to look at the relationship between people and their environments.
You can find out more about his work and the Design Ventura brief, by watching the brief video below:
You can also see Yuri’s most recent sound installation, Sonic Bloom, at Brown Hart Gardens in London until August 2022 (pictured below). Sonic Bloom is an interactive community sculpture with colourful horns that function as speaking tubes, through which members of the public can communicate with each other and listen to the sounds of the city.
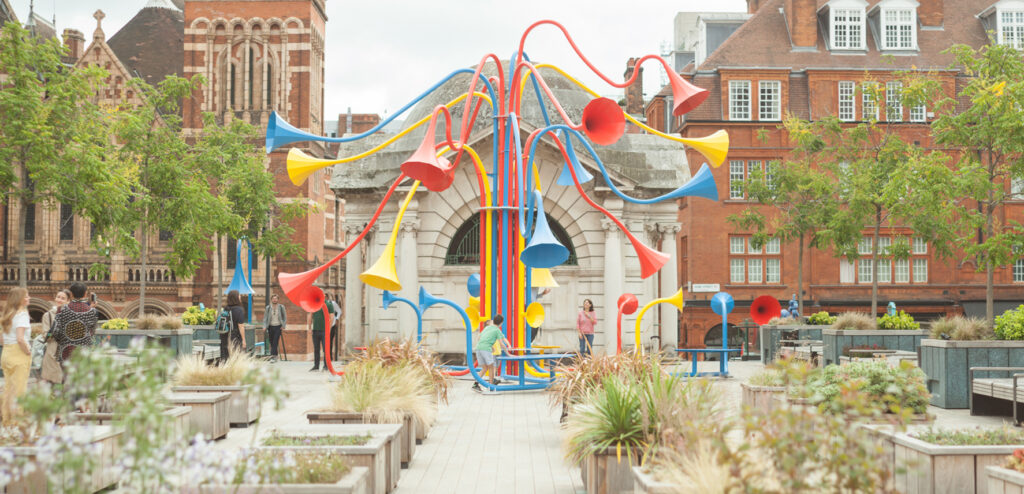
Sonic Bloom, Mayfair, London, Photo credit: Alberto Balazs Other recent projects include The Welcome Chorus, 2020 at Turner Contemporary and Sound in Mind, 2020 at the Design Museum. You can see a selection of his product design and other projects on his website.
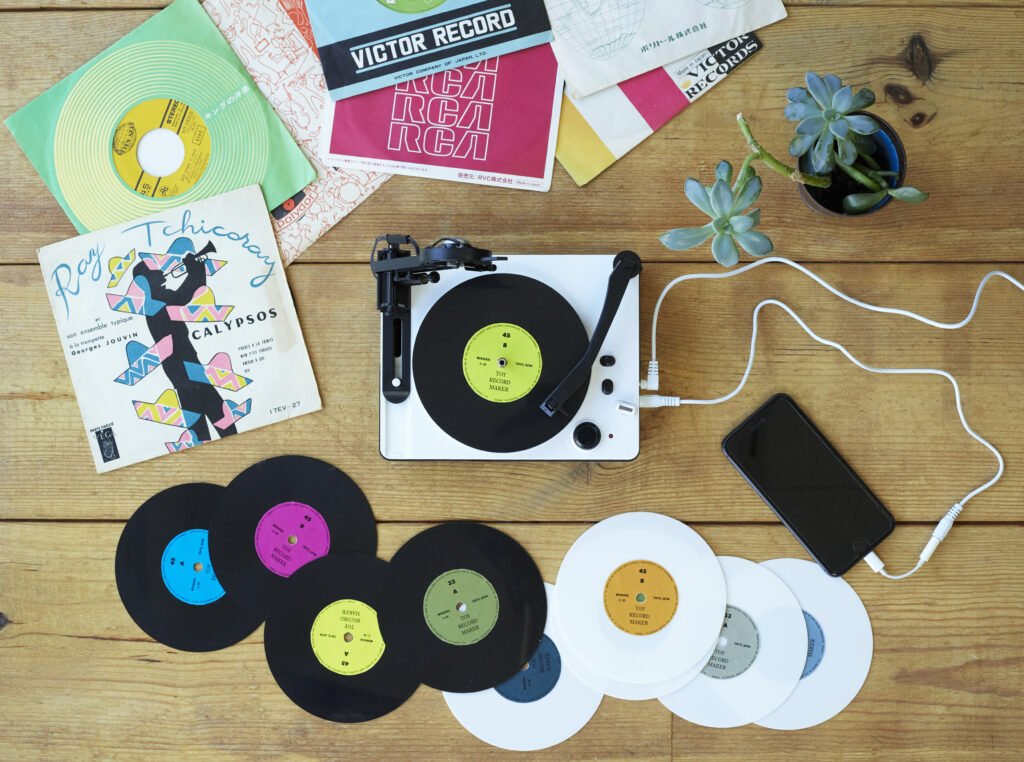
EZ Record Maker, Yuri Suzuki, Photo Credit: Gakken You can watch Yuri’s top tips for students taking part in Design Ventura competition in the video below:
We are delighted that Yuri will be one of our expert judges, helping to choose this year’s winning idea at the Pitching Day in March 2022.
-
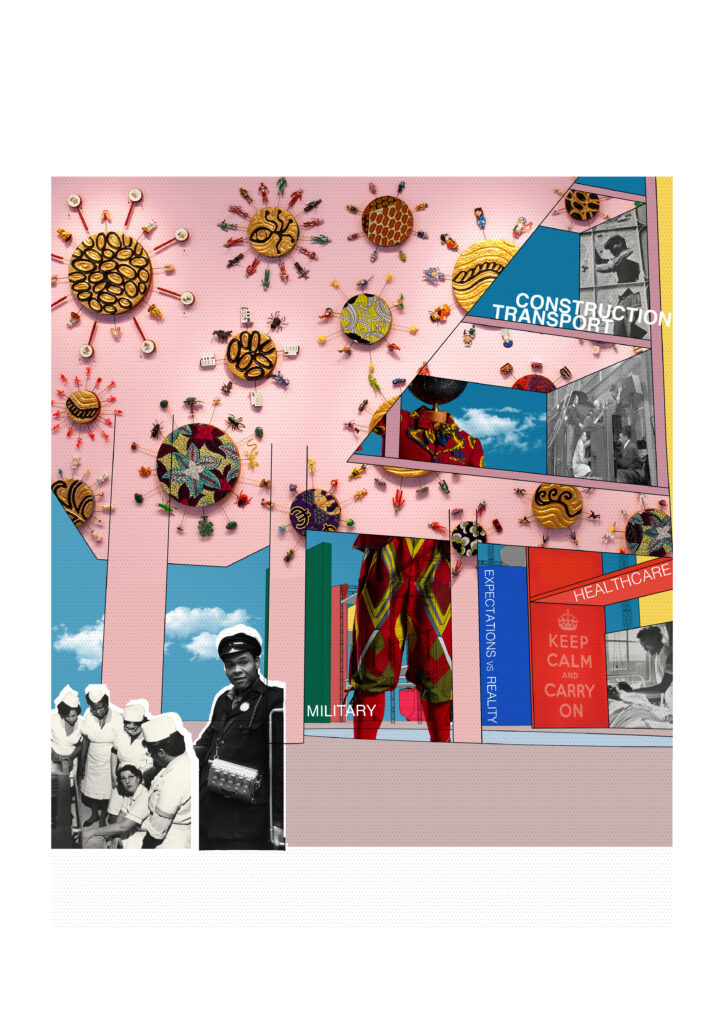
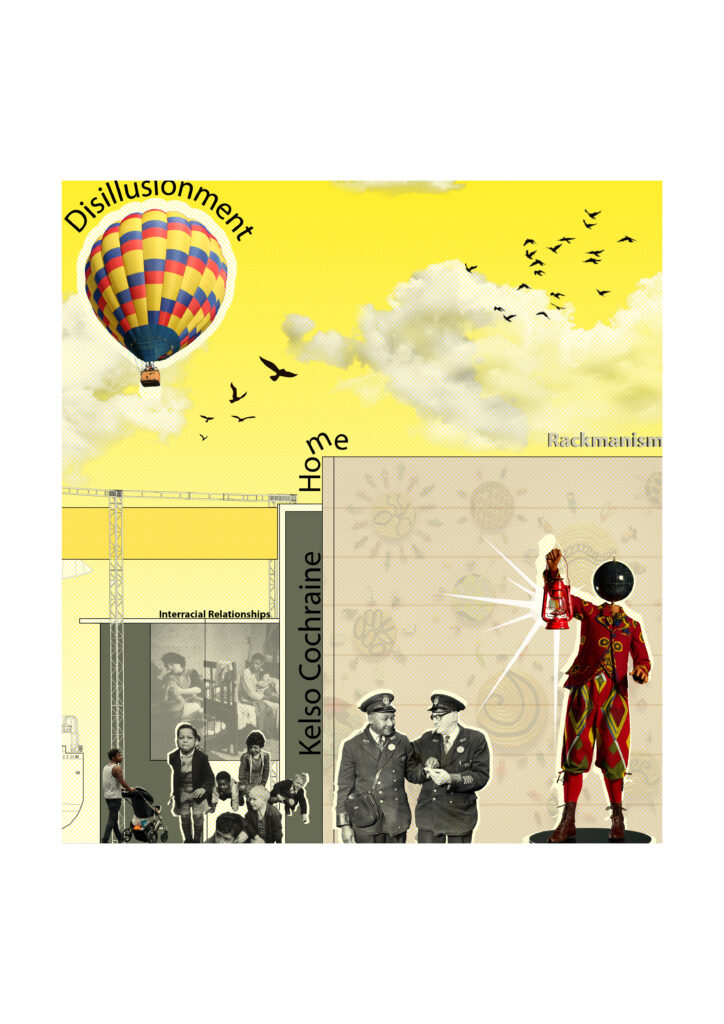
Meet the Design Ventura 2020 Brief Setter: Yinka Ilori
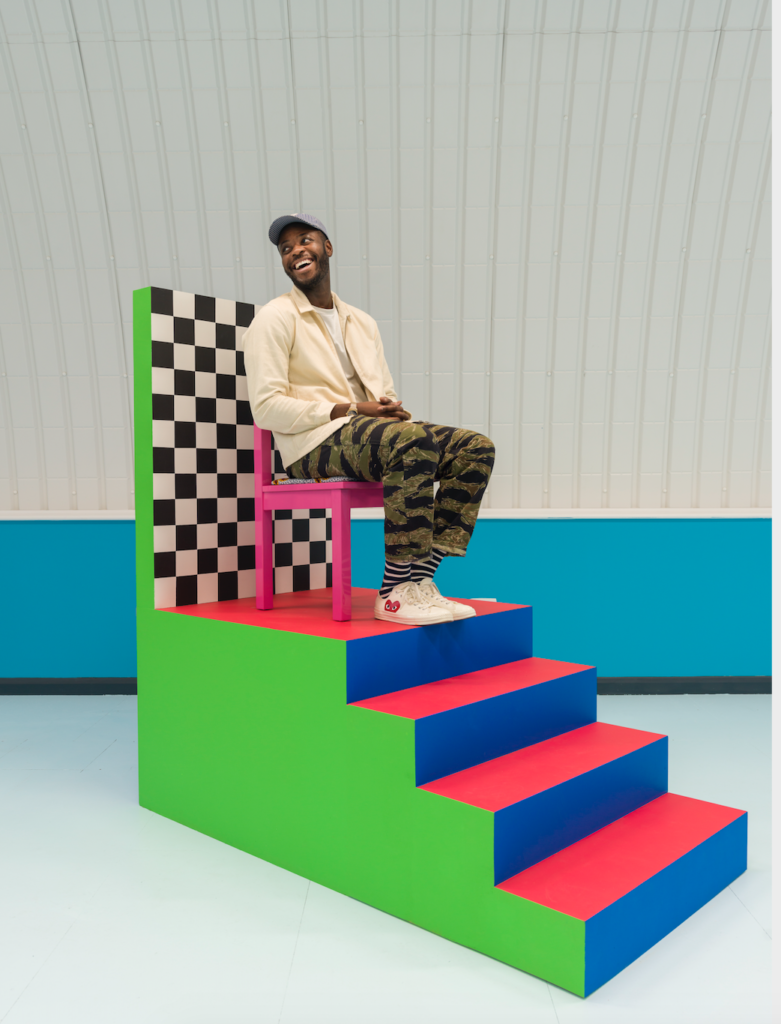
Yinka Ilori, photo credit: Andrew Meredith We are pleased to announce that the Design Ventura 2020 brief setter is artist and designer Yinka Ilori. Watch the brief video below:
Yinka Ilori is well known for his bold designs that use shape and colour to tell stories inspired by his British and Nigerian heritage. Yinka studied Furniture and Product Design at London Metropolitan University. He started by upcycling furniture before moving on to bigger projects, installations and collaborations.
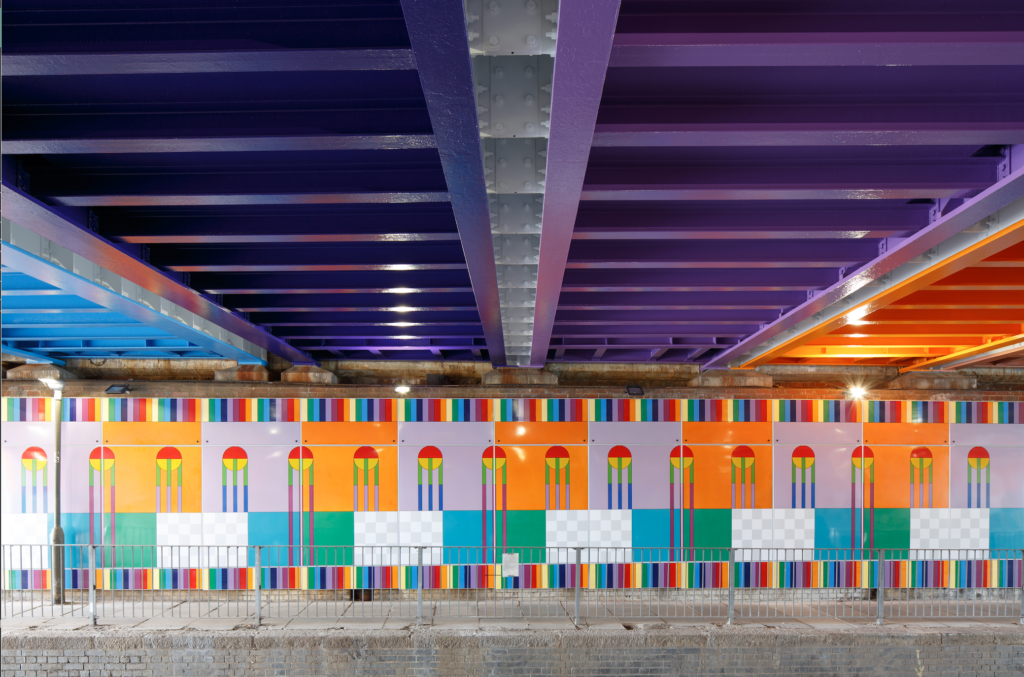
Thessaly Road Bridge, Happy Street, 2019, Photo Credit: Luke O’Donovan Recent projects include The Dulwich Picture Gallery Pavilion 2019: The Colour Palace, the Thessaly Road Bridge underpass Happy Street, 2019 (pictured above) and the Project Earth window display for Selfridges, London (pictured below).
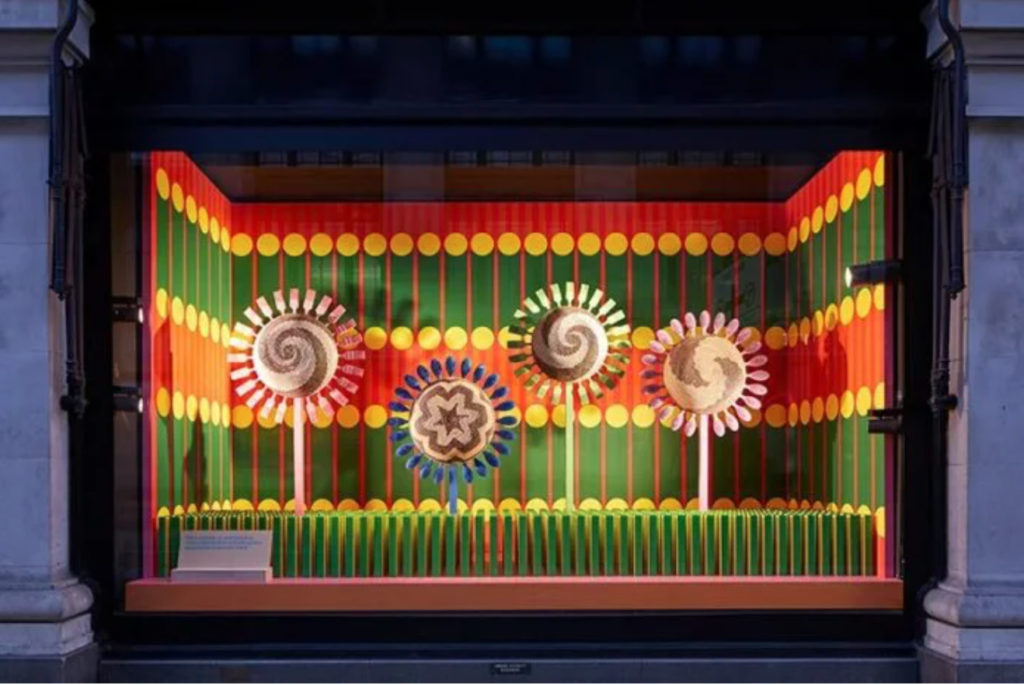
‘Project Earth’ Window display for Selfridges, London, 2020. Photo Credit: Studiostagg Yinka works with a team of architects and designers out of a studio in Nortth West London. You can see Yinka’s top tips for students taking part in Design Ventura in the video below:
We are delighted that Yinka will be one of our expert judges, helping to choose this year’s winning idea, at the Pitching Day in March 2021.
-
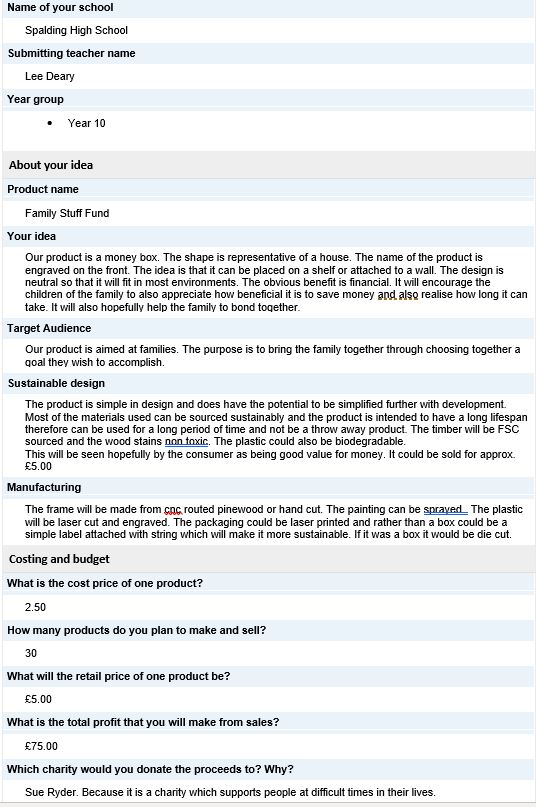
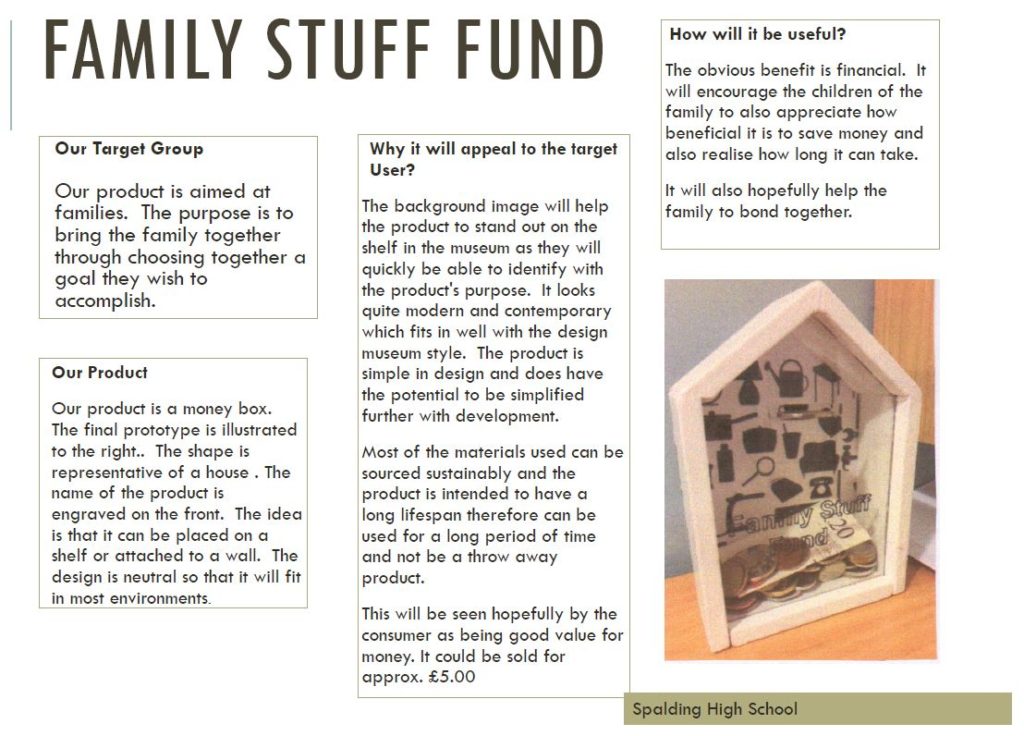
Example Submission: 2018 Family Stuff Fund
As the deadline for Design Ventura approaches, we wanted to look back at the submission that won ‘commendation for most market ready product’ back in Design Ventura 2018.
The judges loved Spalding School’s Family Stuff Fund. The panel liked that the idea improved every day life for one of the Design Museum Shop’s target users – families. This was well demonstrated thorough development, prototyping and research.
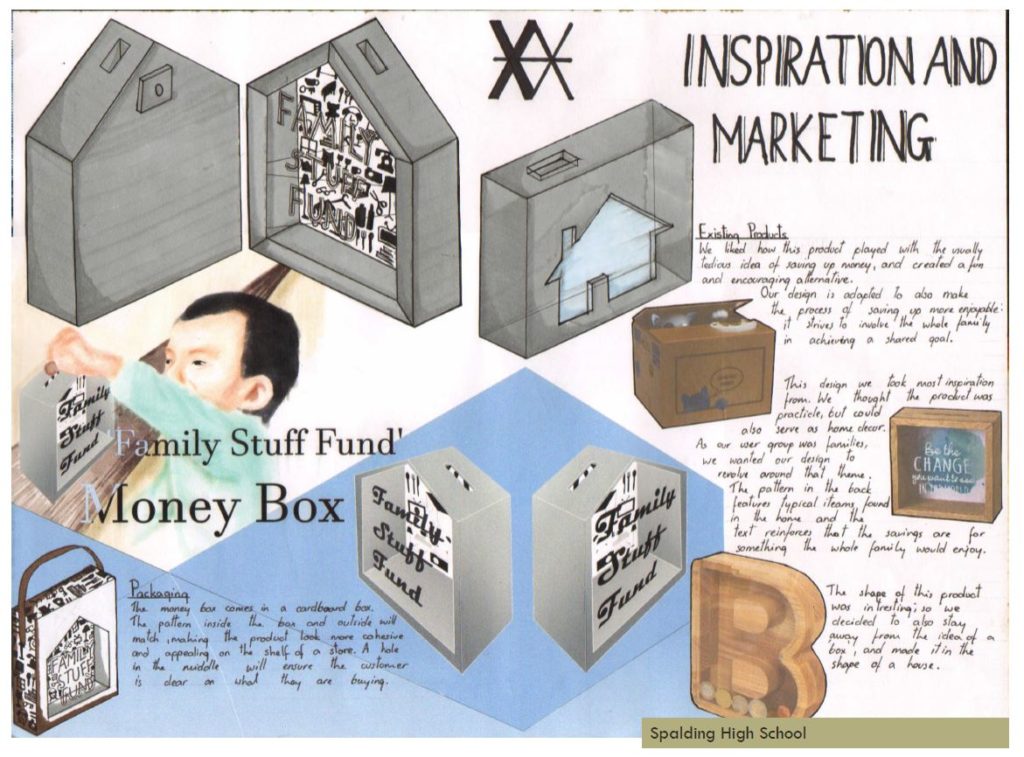
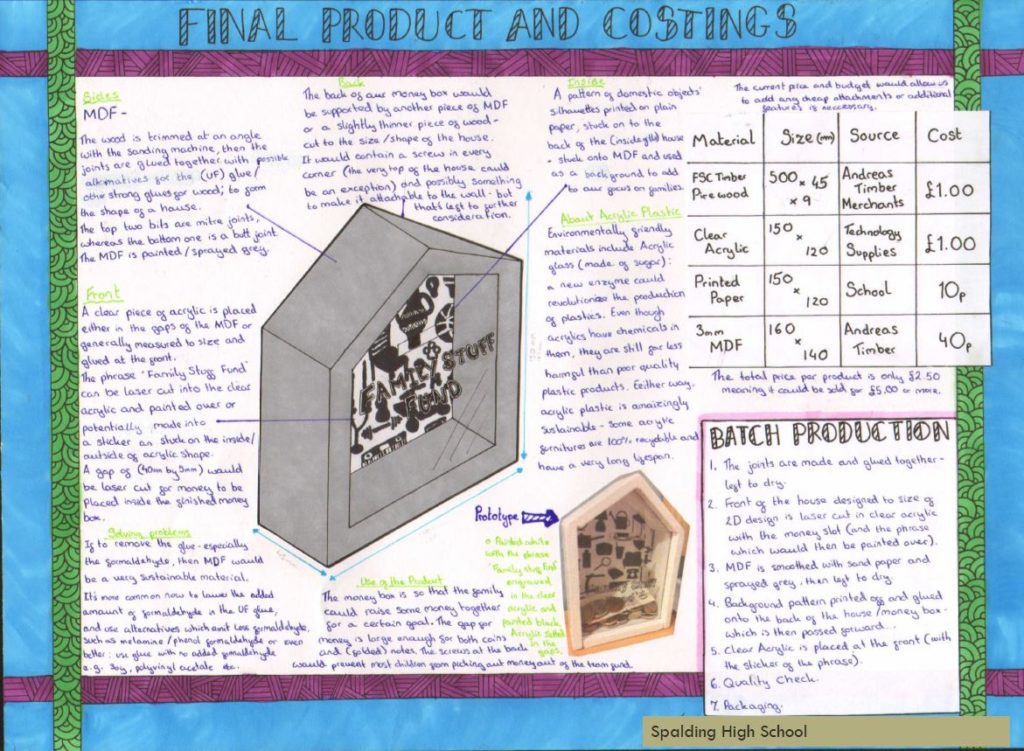
Below is their submission form and A3 sheets. We’d like to highlight some of the strengths and some areas for improvement from their submission, things to look out for when submitting for Design Ventura 2019.
Strengths:
- Clarity – the layout is clear and easy to understand. The sheets clearly communicate what the product is and show the design process. Also, each sheet has the name of the school at the bottom.
- Design Development – the sheets show the design process. They include initial sketches of the idea, research into similar existing products, photos of prototypes and ideas for packaging design.
- Budgeting – they have looked at costings and suppliers.
Areas for improvement:
- Further research – while they have shown good research of other similar products, some further research of the Design Museum Shop specifically could have been useful to show.
- User testing and feedback – including feedback on their design by their target audience would have strengthened this entry.
- Sustainability – more information about how they plan to minimise the negative impact of their product on the environment would have strengthened this entry.
The Spalding High School team made it into the Design Ventura 2018 top ten shortlist with this submission. They pitched their ideas to our expert judges at the Pitching Event in December and were awarded ‘commendation for most market ready product’ at the Celebration Event in February.
We can’t wait to see all the wonderful submissions for Design Ventura 2019!
-
Meet the 2019 Design Ventura Brief Setters – Assemble
To celebrate the tenth year of Design Ventura, we are pleased to announce that our Design Ventura 2019 brief setter is Turner Prize-winning design studio Assemble, a London-based collective working across architecture, design and art.
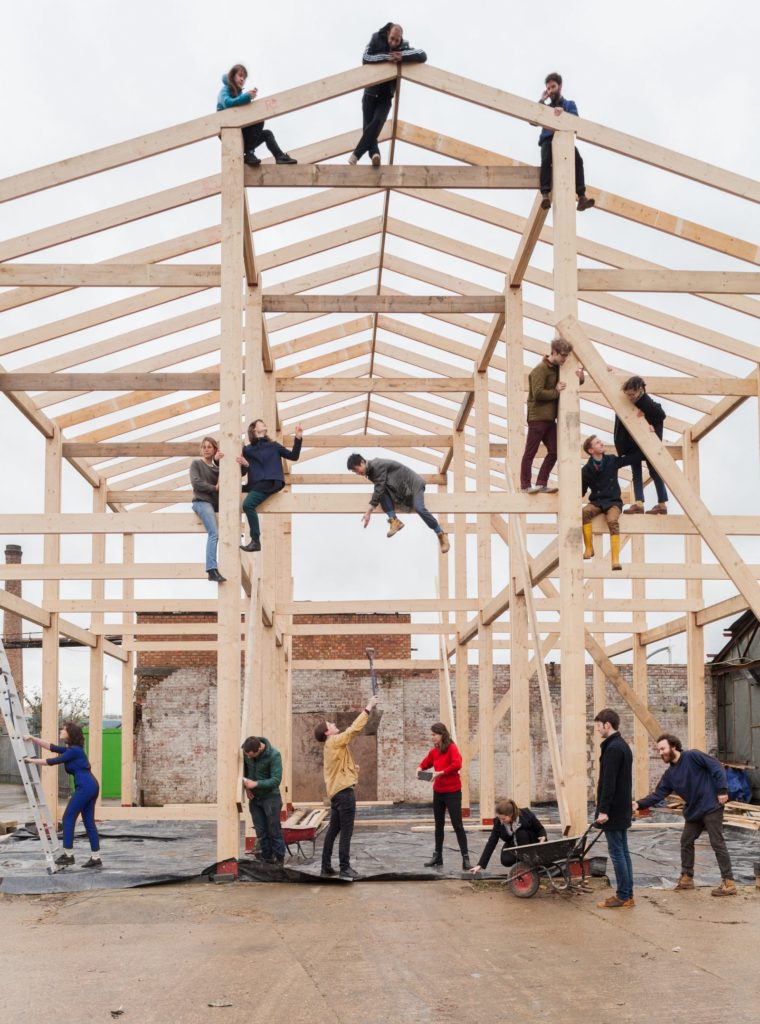
Assemble Assemble’s mission is to realize buildings, enterprises, and organizations that support creativity, collaboration, and citizen participation. Their social focus and unique approach was recognised in the receipt of the 2015 Turner Prize – the UK’s foremost art award.
Assemble, Turner Prize Exhibition 2015 Paloma Strelitz, co-founder and partner of Assemble, launched the 10th year of Design Ventura with this year’s brief film:
Design Ventura 2019 Brief Film Paloma studied architecture at Cambridge University and the Royal College of Art. You can see her top tips for tackling the Design Ventura brief below:
We are delighted that co-founder Jo Halligan will be representing Assemble as one of our expert judges, helping to choose this year’s winning idea, at the Pitching Day in December.
-
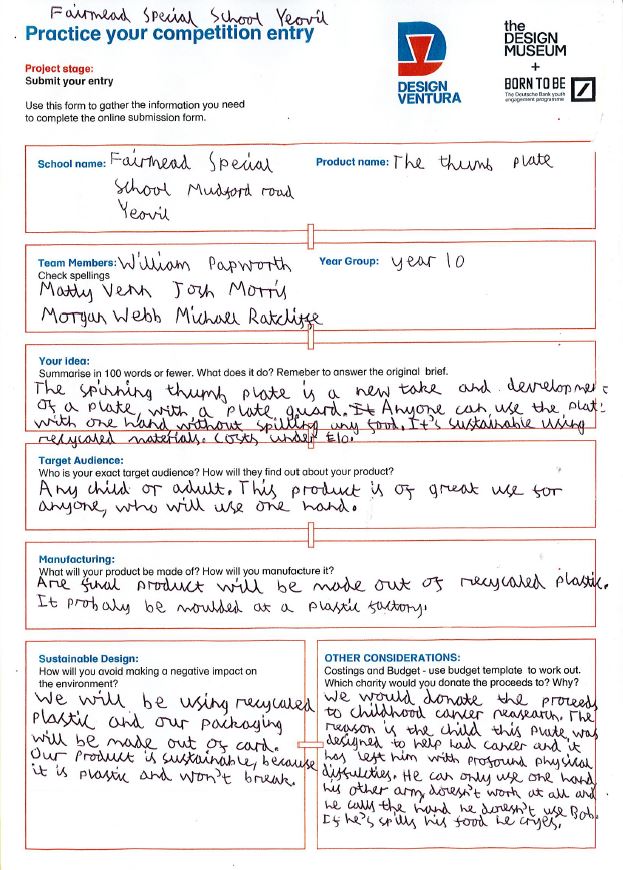
Example Submission: 2017 Second Place Entry – Fairmead School
As the deadline for Design Ventura 2018 approaches (Wednesday 14 November, 5pm), we wanted to look back at the submission that won second place in last year’s competition.
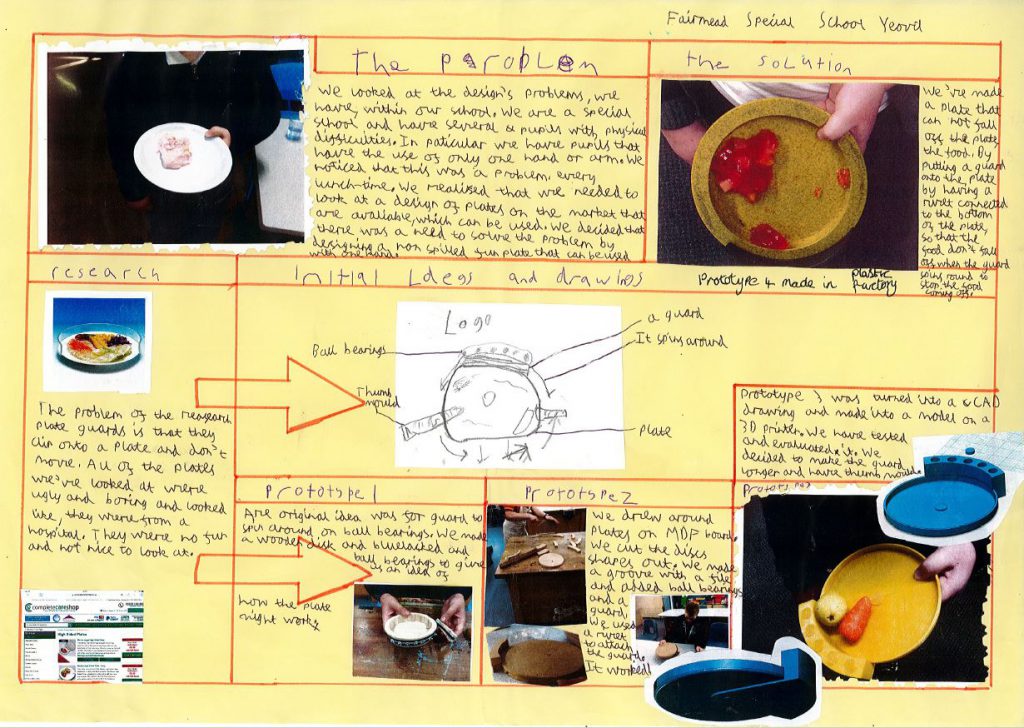
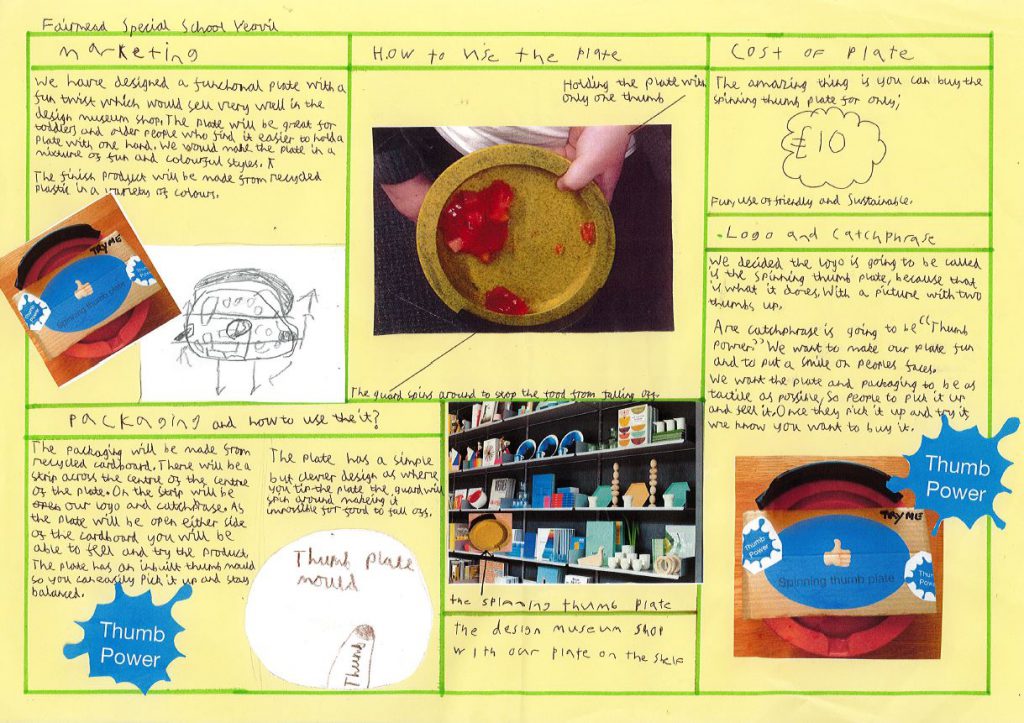
The judges loved Fairmead School’s Spinning Thumb Plate. The panel liked that the idea met a specific need, demonstrated thorough development, prototyping and research.
Below is their submission form and A3 sheets. We’d like to highlight some of the strengths and some areas for improvement from their submission, things to look out for when submitting for Design Ventura 2018.
Entry Form:
A3 Sheets:
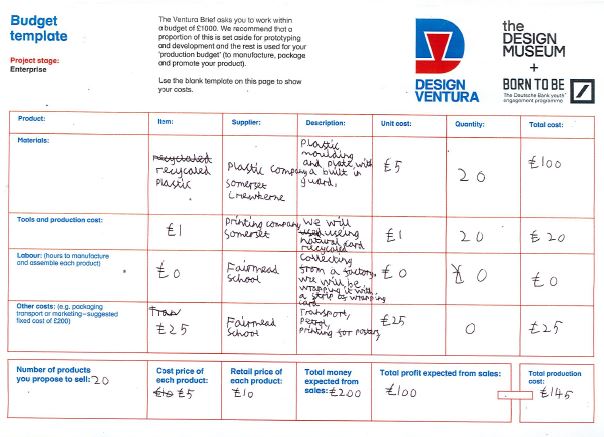
Budget:
Strengths:- Clarity – the layout is clear and easy to understand. The sheets clearly communicate what the product is and show the full design process. Also, each sheet has the name of the school at the top.
- Design Development – the sheets show the design process from beginning to end. They include initial sketches of the idea and photos of different prototypes. They show the product in use and the planned packaging design.
- Budgeting – they have filled out a sample budget sheet, looking at costings and suppliers. (While the budget sheet is not a requirement of submission, clear costings should be included in your A3 sheets if not included in a separate budget sheet.)
Areas for improvement:
- Only 2 sheets – we do ask schools to submit 3 sheets and an optional, additional budget sheet.
- Further research – while they have shown good research of other similar products, some further research of the Design Museum Shop specifically could have been useful to show.
- User testing and feedback – including feedback on their design by their target audience would have strengthened this entry.
We can’t wait to see all the wonderful submissions for Design Ventura 2018!
-
How to submit your entry: step by step guide
Here is your step by step guide on how to submit your entry. If you need further advice, please refer back to our finishing up resources or contact us via email: ventura@designmuseum.org
For a complete entry we need to receive:
- complete online form for which this post is a step by step guide
- 3 x A3 design sheets saved as pdf. We recommend that you add your school name to the top of each A3 sheet
- optional budget template sheet saved as pdf. You can find a template Budget sheet template here.
- completed teacher evaluation form
- completed student evaluation form for all participating students (not just the winning team)
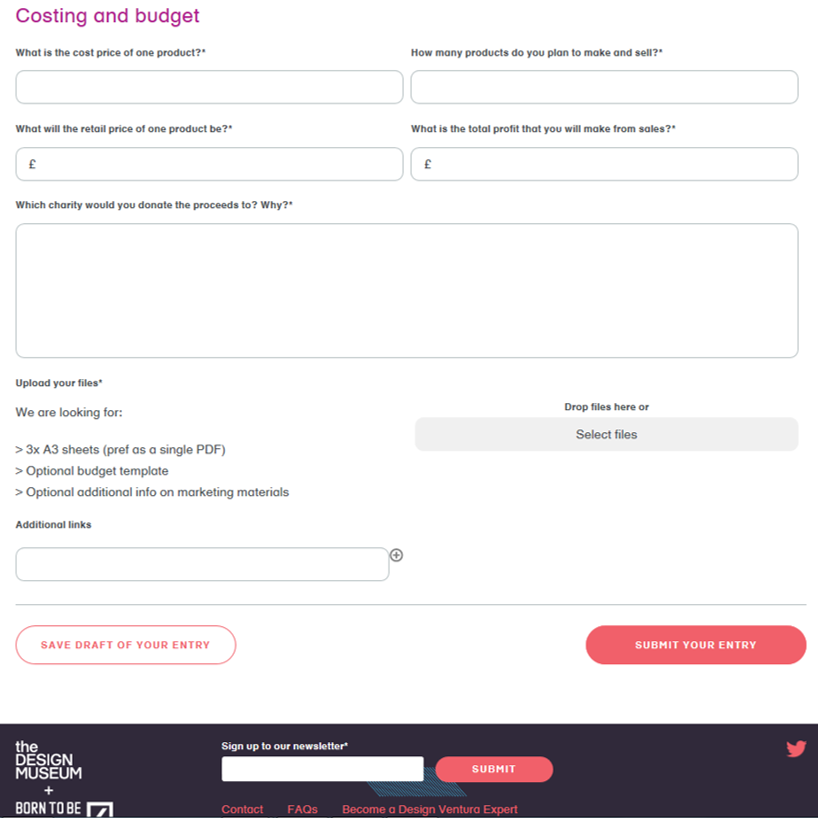
How to complete your online entry form:
- Log in to the Design Ventura website https://ventura.designmuseum.org/ If you forgot your password, you can reset it here.
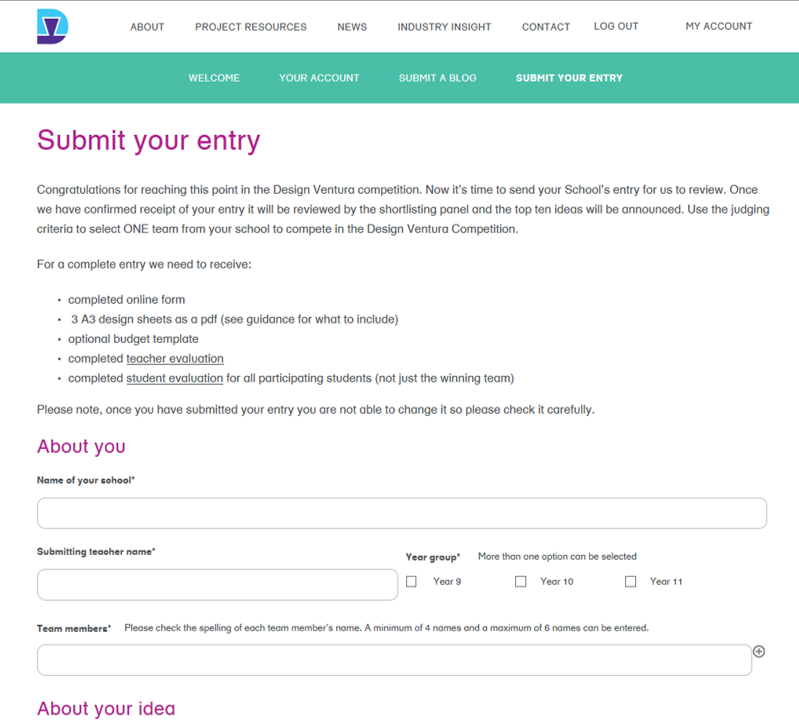
- Click on “Submit your entry”.
- Work with the team to complete the online competition form. You have the option to save your entry as a draft or submit it.
- At the bottom of the competition form, you’ll need to upload your documents, preferably as one single pdf (see more about it on What to attach section)
- Once you are happy with your form, click “Submit your entry” at the bottom right.
What to attach:
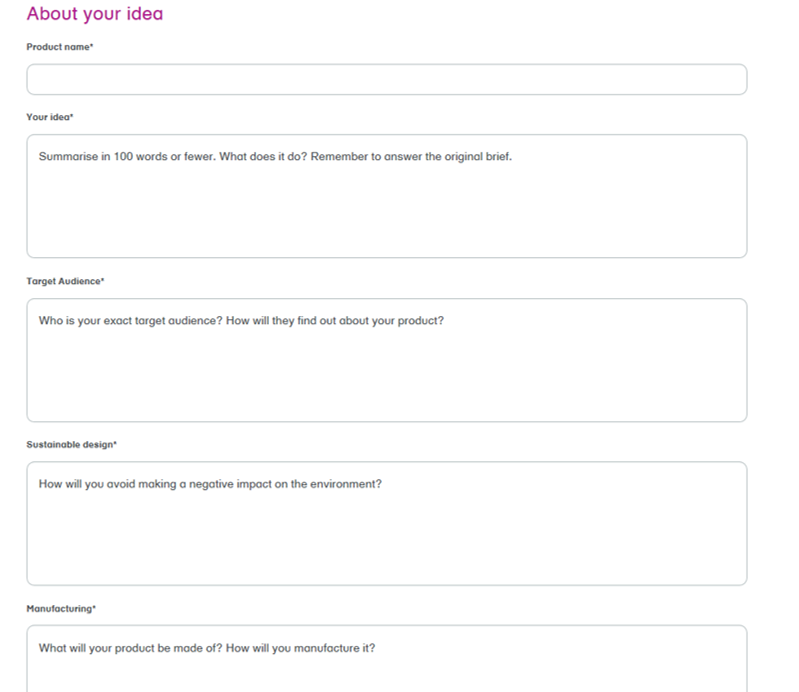
- 3x A3 Design Sheets (make sure you add your school nae at the top of each sheet):
- Research and initial ideas
- Idea develpment
- Final design
- These can be hand drawn and scanned, or created digitally.
- Ideal file formats: PDF or jpeg.
- Max file size: 3MB.
- Please include your school name in each file name eg: Ventura Academy Design Sheets.pdf
Please note: once you have submitted your entry you are not able to change it so please check it carefully.
You might find our practise your Entry form useful in preparation of your final submission.
Good luck!
-
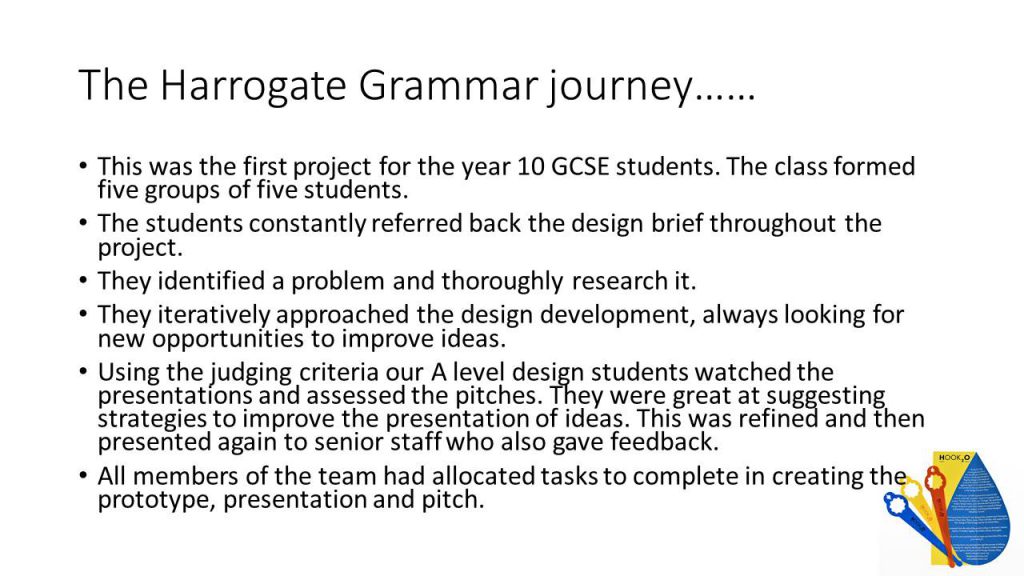
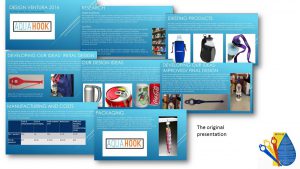
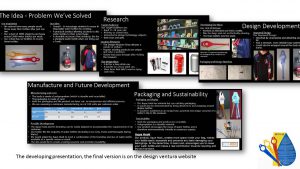
The Harrogate Grammar School journey…
During our Finishing and Presenting ideas webinars, the participants had a chance to know in detail the journey of last year’s winner from the perspective of their leading school teacher, Dave Allen. We thought that Dave’s presentation was very comprehensive, explained what we are looking for and showed in detail the journey that the Harrogate Grammar team went through. We have made Dave’s presentation available below for your reference whilst doing your Design Ventura project (PS – make sure you check his tips at the very end!).
If you couldn’t attend any of our webinars, you can now consult our webinars here.
-
Top #5 tips for your submission
As we are getting closer to the submission day – 14 November at 5pm – we thought that you could use some last minute tips. For a detailed handout on how to submit your entry step by step, please click here.
- One submission per school. Remember, your school can submit only one entry so choose wisely! You can still feature other ideas on our website by submitting a blog post, or tweeting about it using the hashtag #designventura.
- Short and sweet. The shortlisting panel will be going through a lot of entries so make sure that your form is easy to understand and straight to the point.
- Be ready for submission. The final submission form is very important, please refer back to the judging criteria. When you log in to submit your entry, have your files saved on your computer ready for uploading. We recommend that you add your school name to the top of each A3 sheet and submit your attachment in pdf format.
- Evaluation form. Please make sure that both teachers and students fill in their evaluation form.
- Let’s do it! Enter your school’s idea even if you don’t think you have a ‘winner’. Our judges see the potential in all ideas. Remember: all schools that submitted an idea will receive certificates to mark your student’s participation.
We cannot wait to see all your ideas! Good luck everyone!
-
Design Ventura video brief now available!
Anna Bullus, Gumdrop Ltd introduces the 2017 Design Ventura Brief.
Design Ventura Brief 2017 from Design Museum on Vimeo.
-
What it’s like to volunteer for Design Ventura

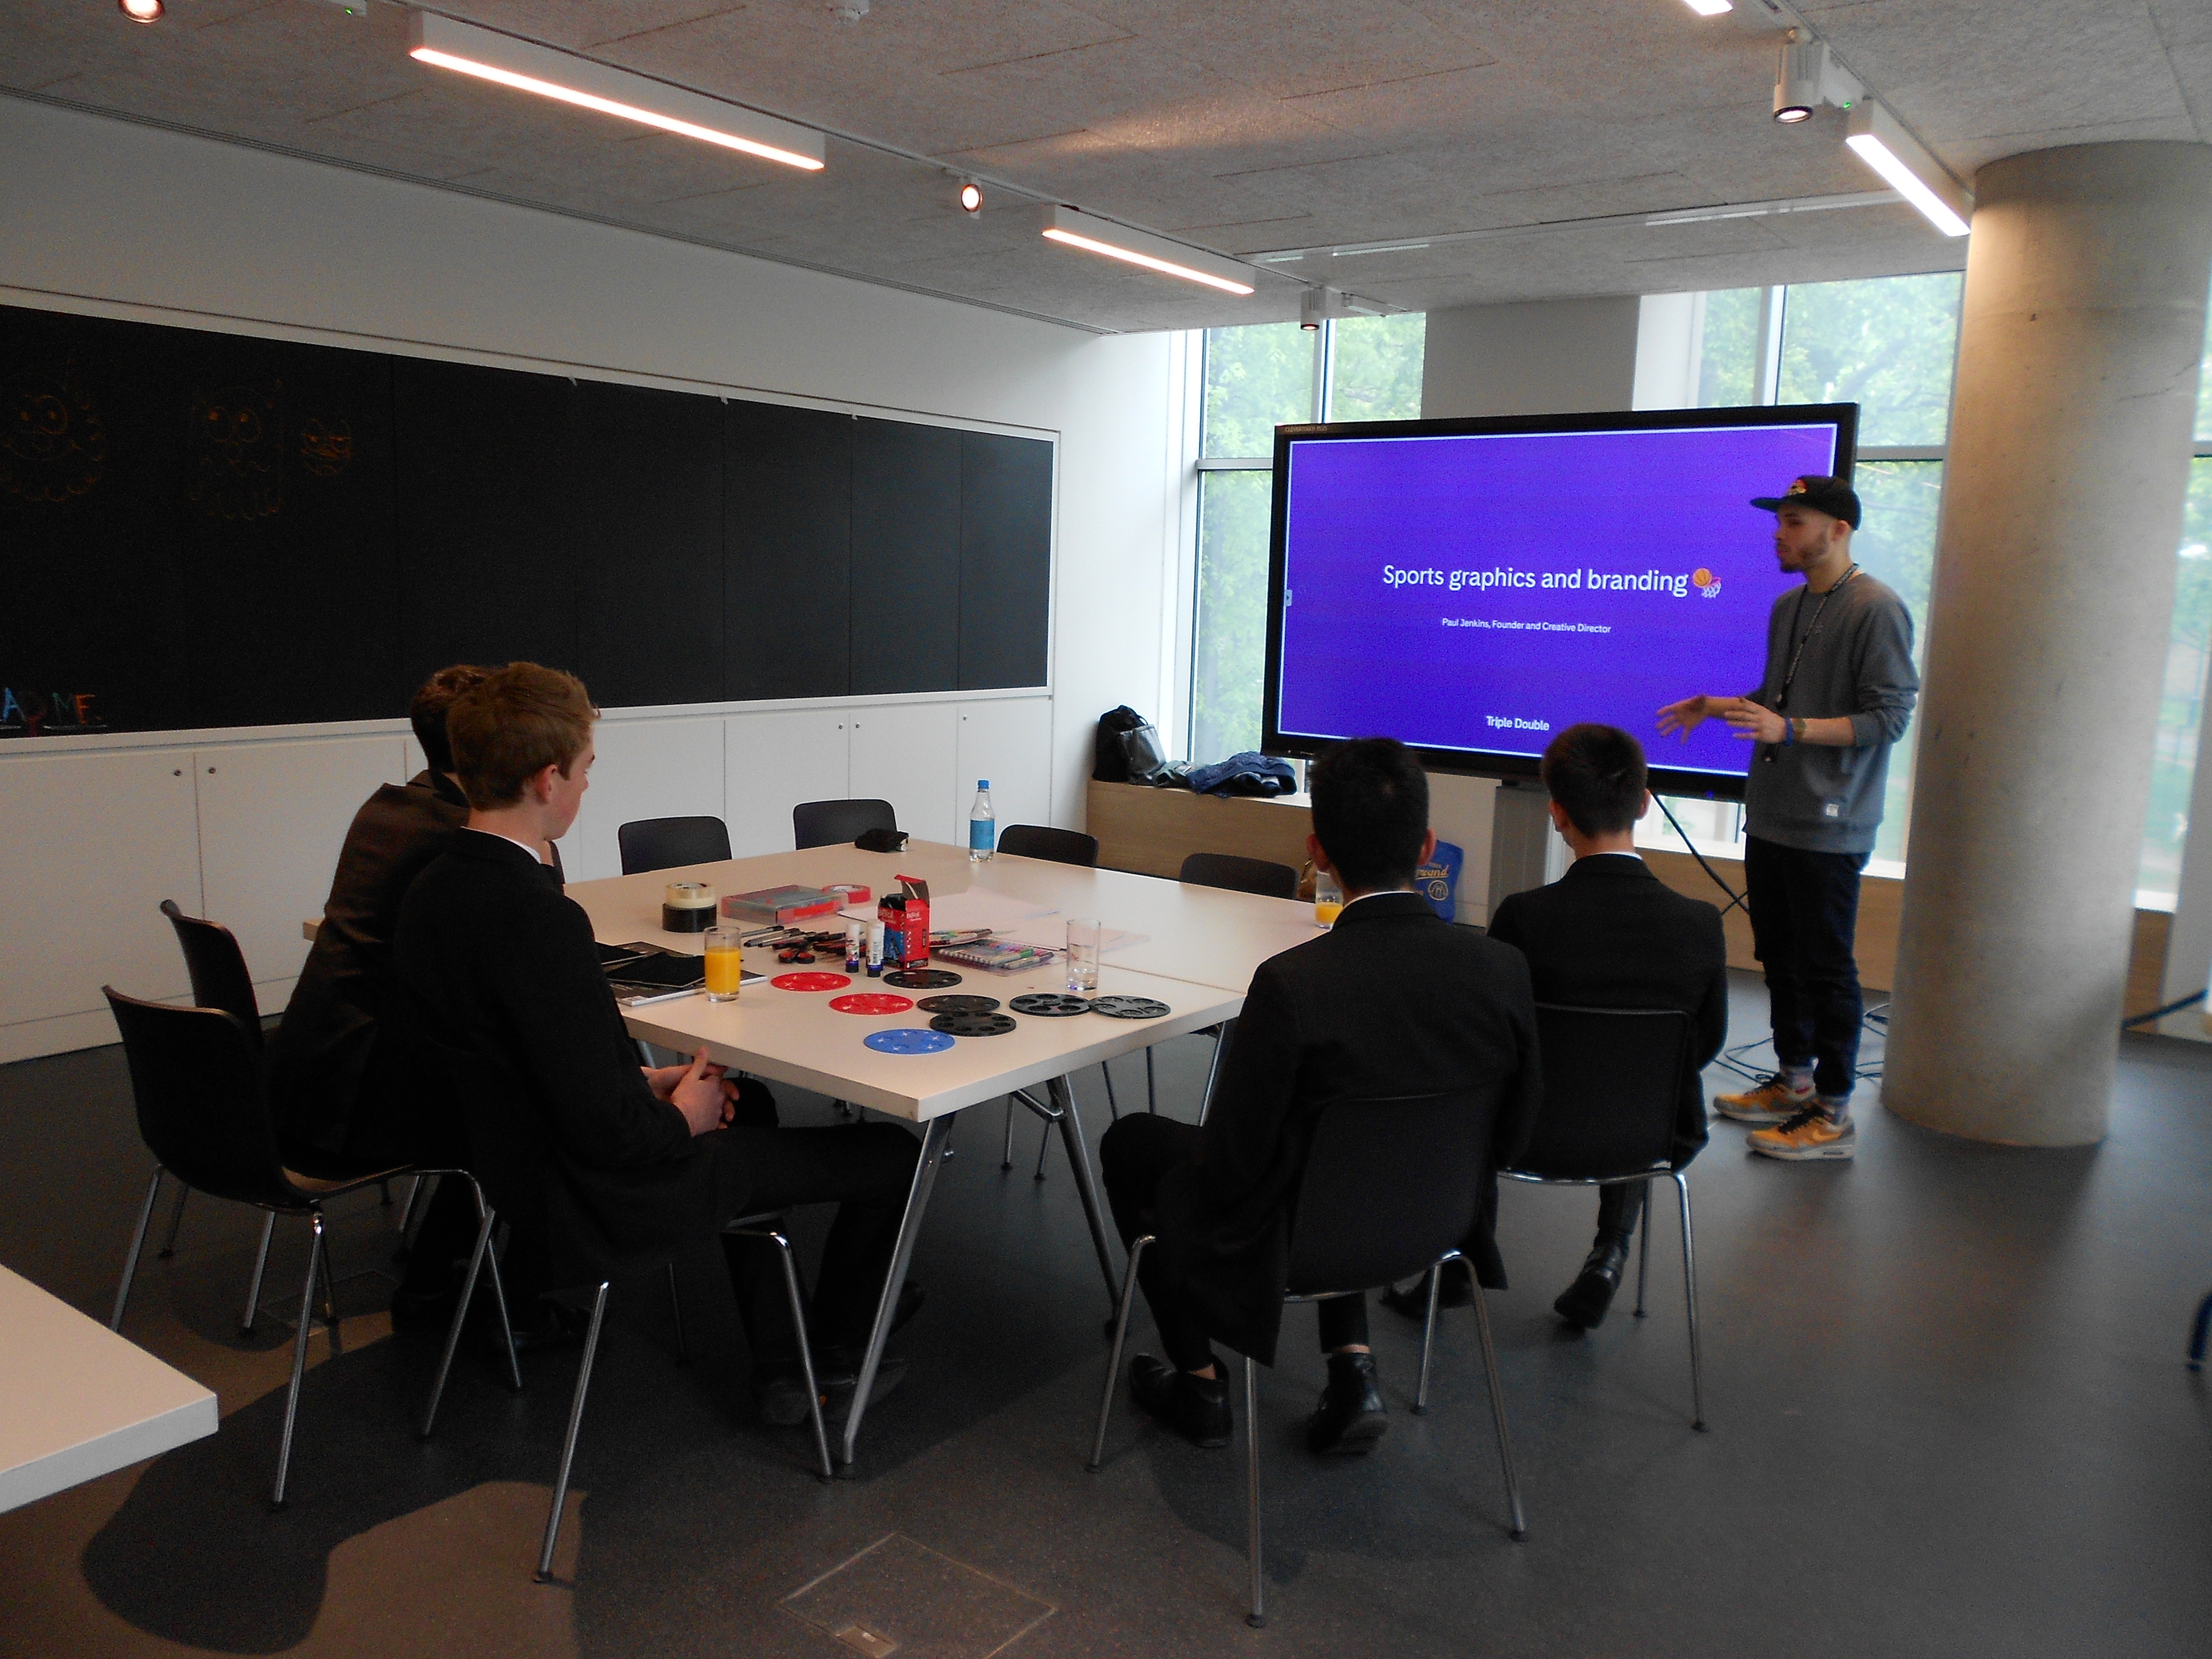
Hello, I’m Paul Jenkins, the Founder and Creative Director at Triple Double. We are a design studio who solve problems and get work done – creating, refreshing and fixing. Oh, and we love basketball. We work with clients such as adidas Originals, Airbnb, BBC, Ellesse, General Assembly, Mercari Europe, Nike, Thames & Hudson and Wellcome Collection.
My role involves leading on creative and design projects, working collaboratively with clients and their internal teams. We team up with specialist collaborators across design, illustration, photography, film and digital when needed as well. Before starting Triple Double, I held design, creative and art director roles at Selfridges, Mother London, U-Dox and Pentland Brands.
Over the years I’ve worked across sports and fashion brands, from campaigns and product launches to projects such as Nike78. It was a natural fit for my experience so when I was asked to be the design volunteer supporting the Independent school winner’s prize day in April 2017, I jumped at the opportunity.
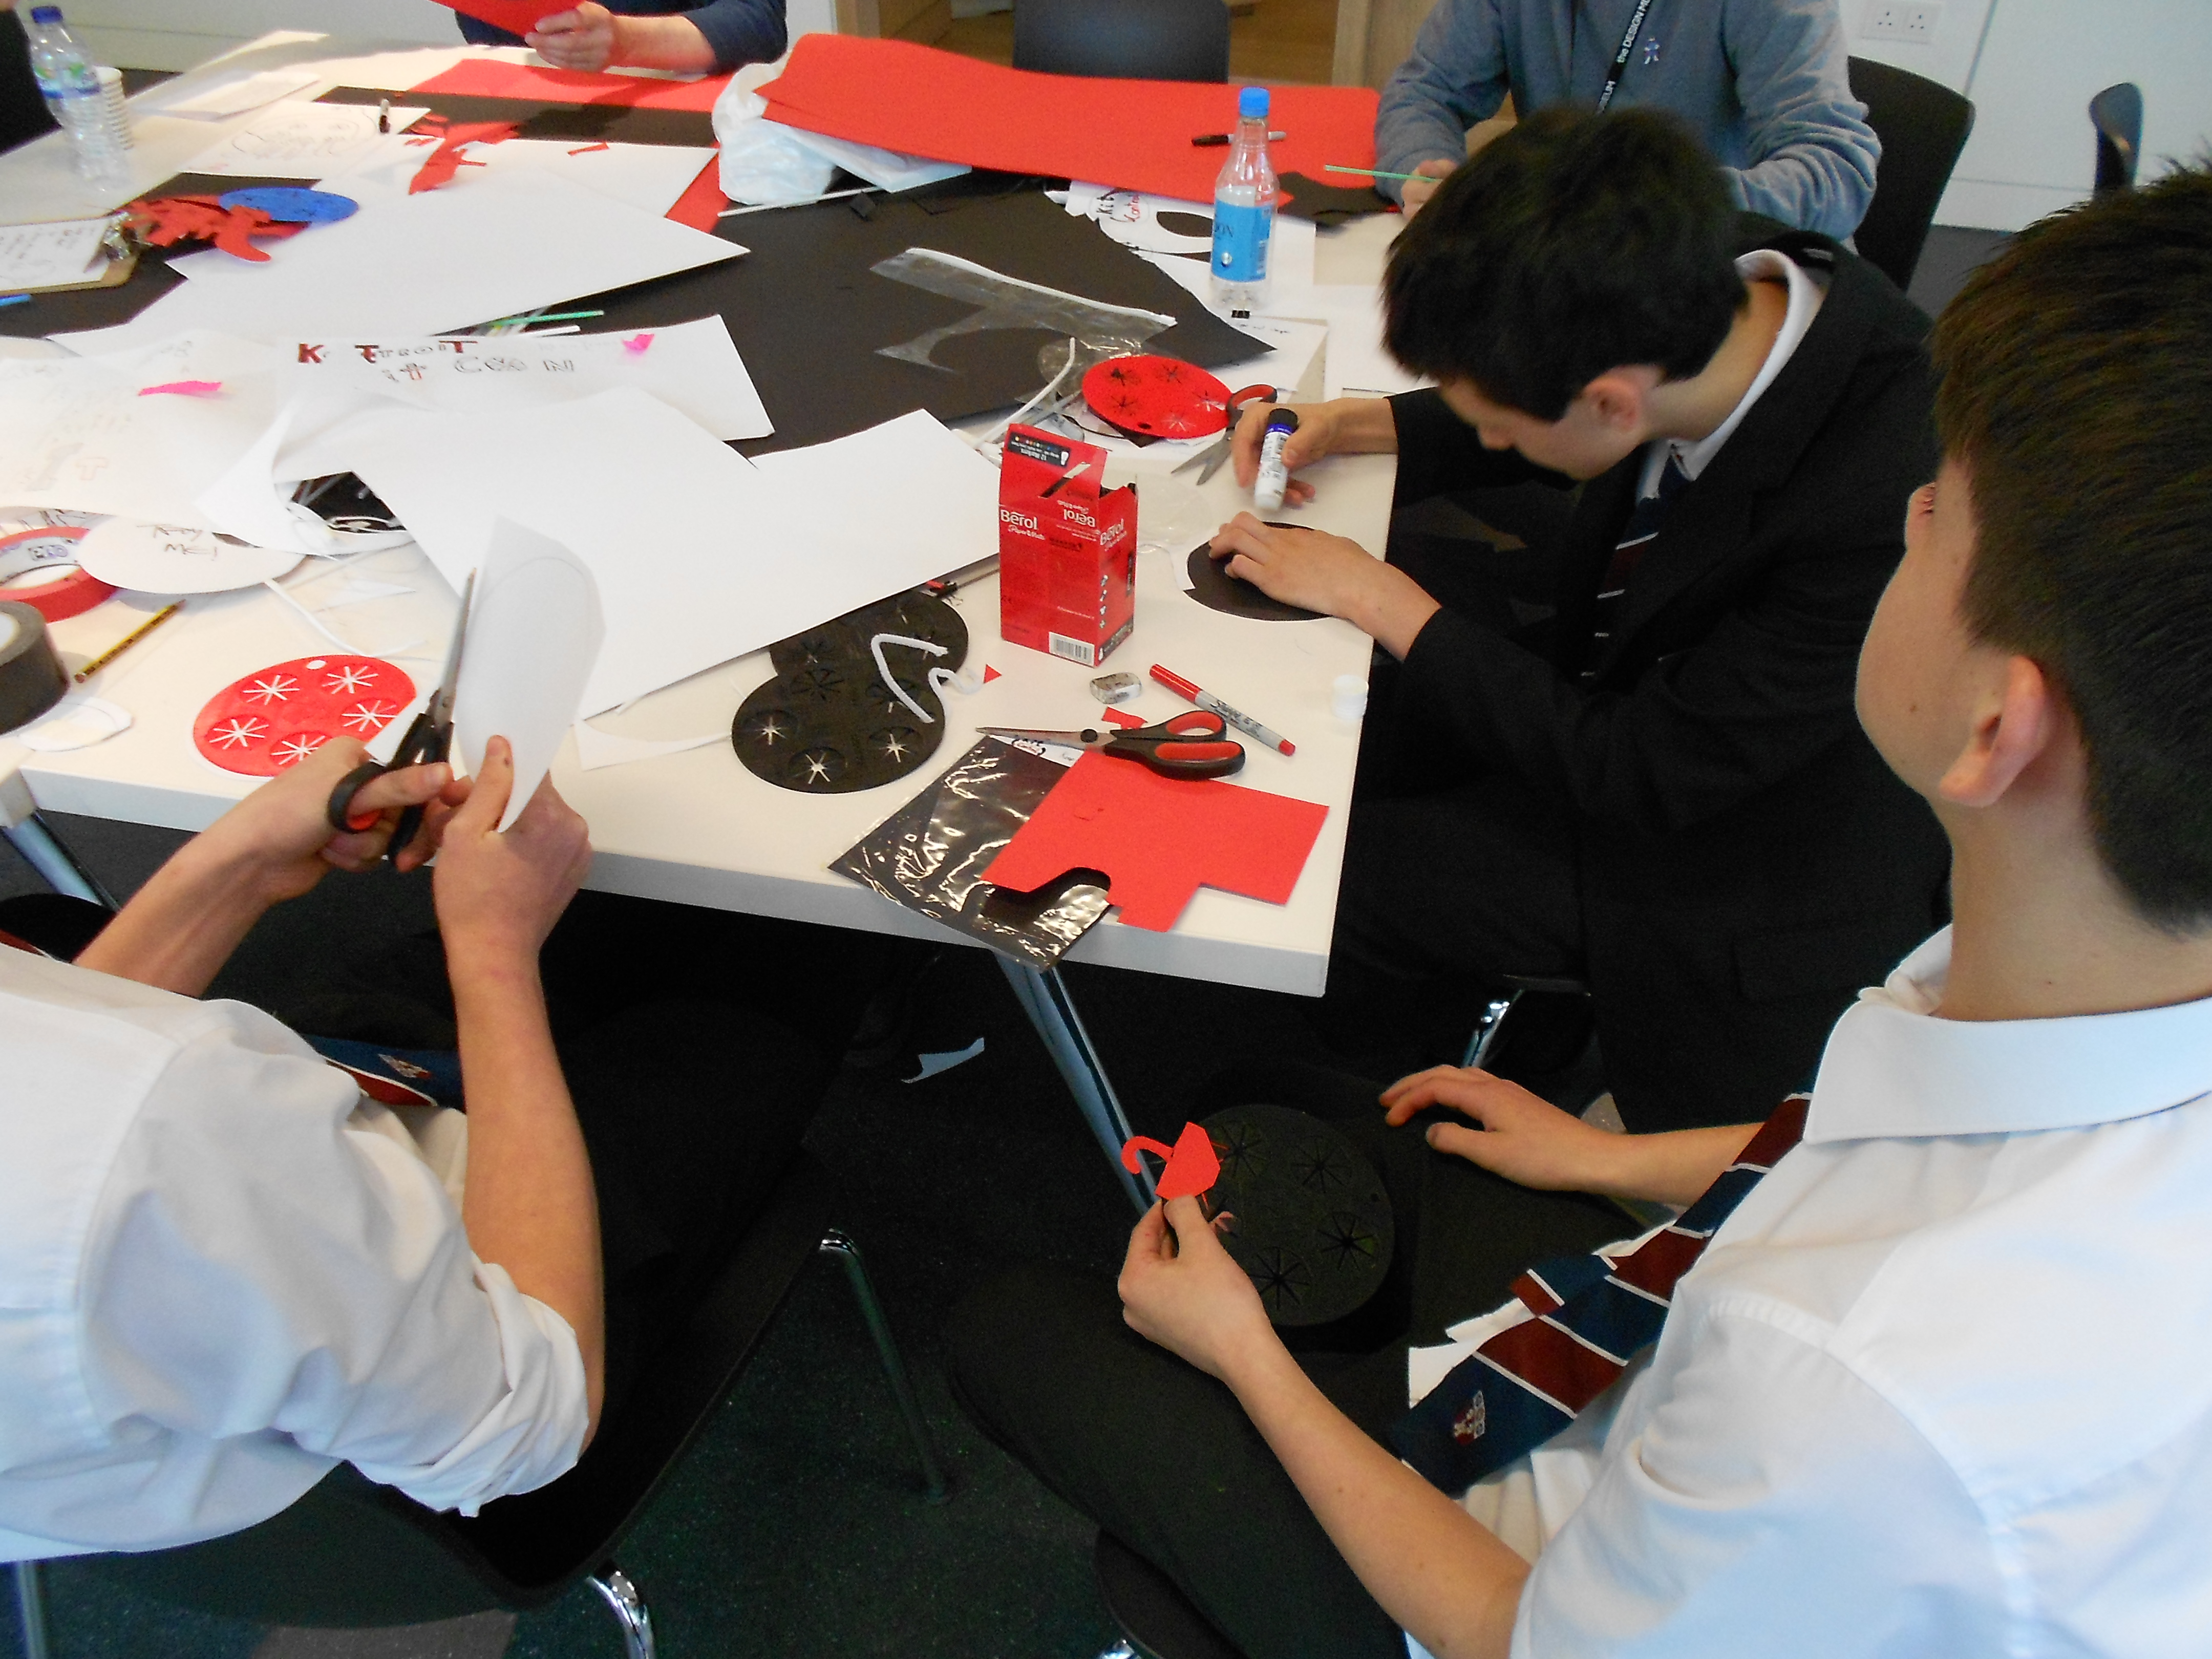
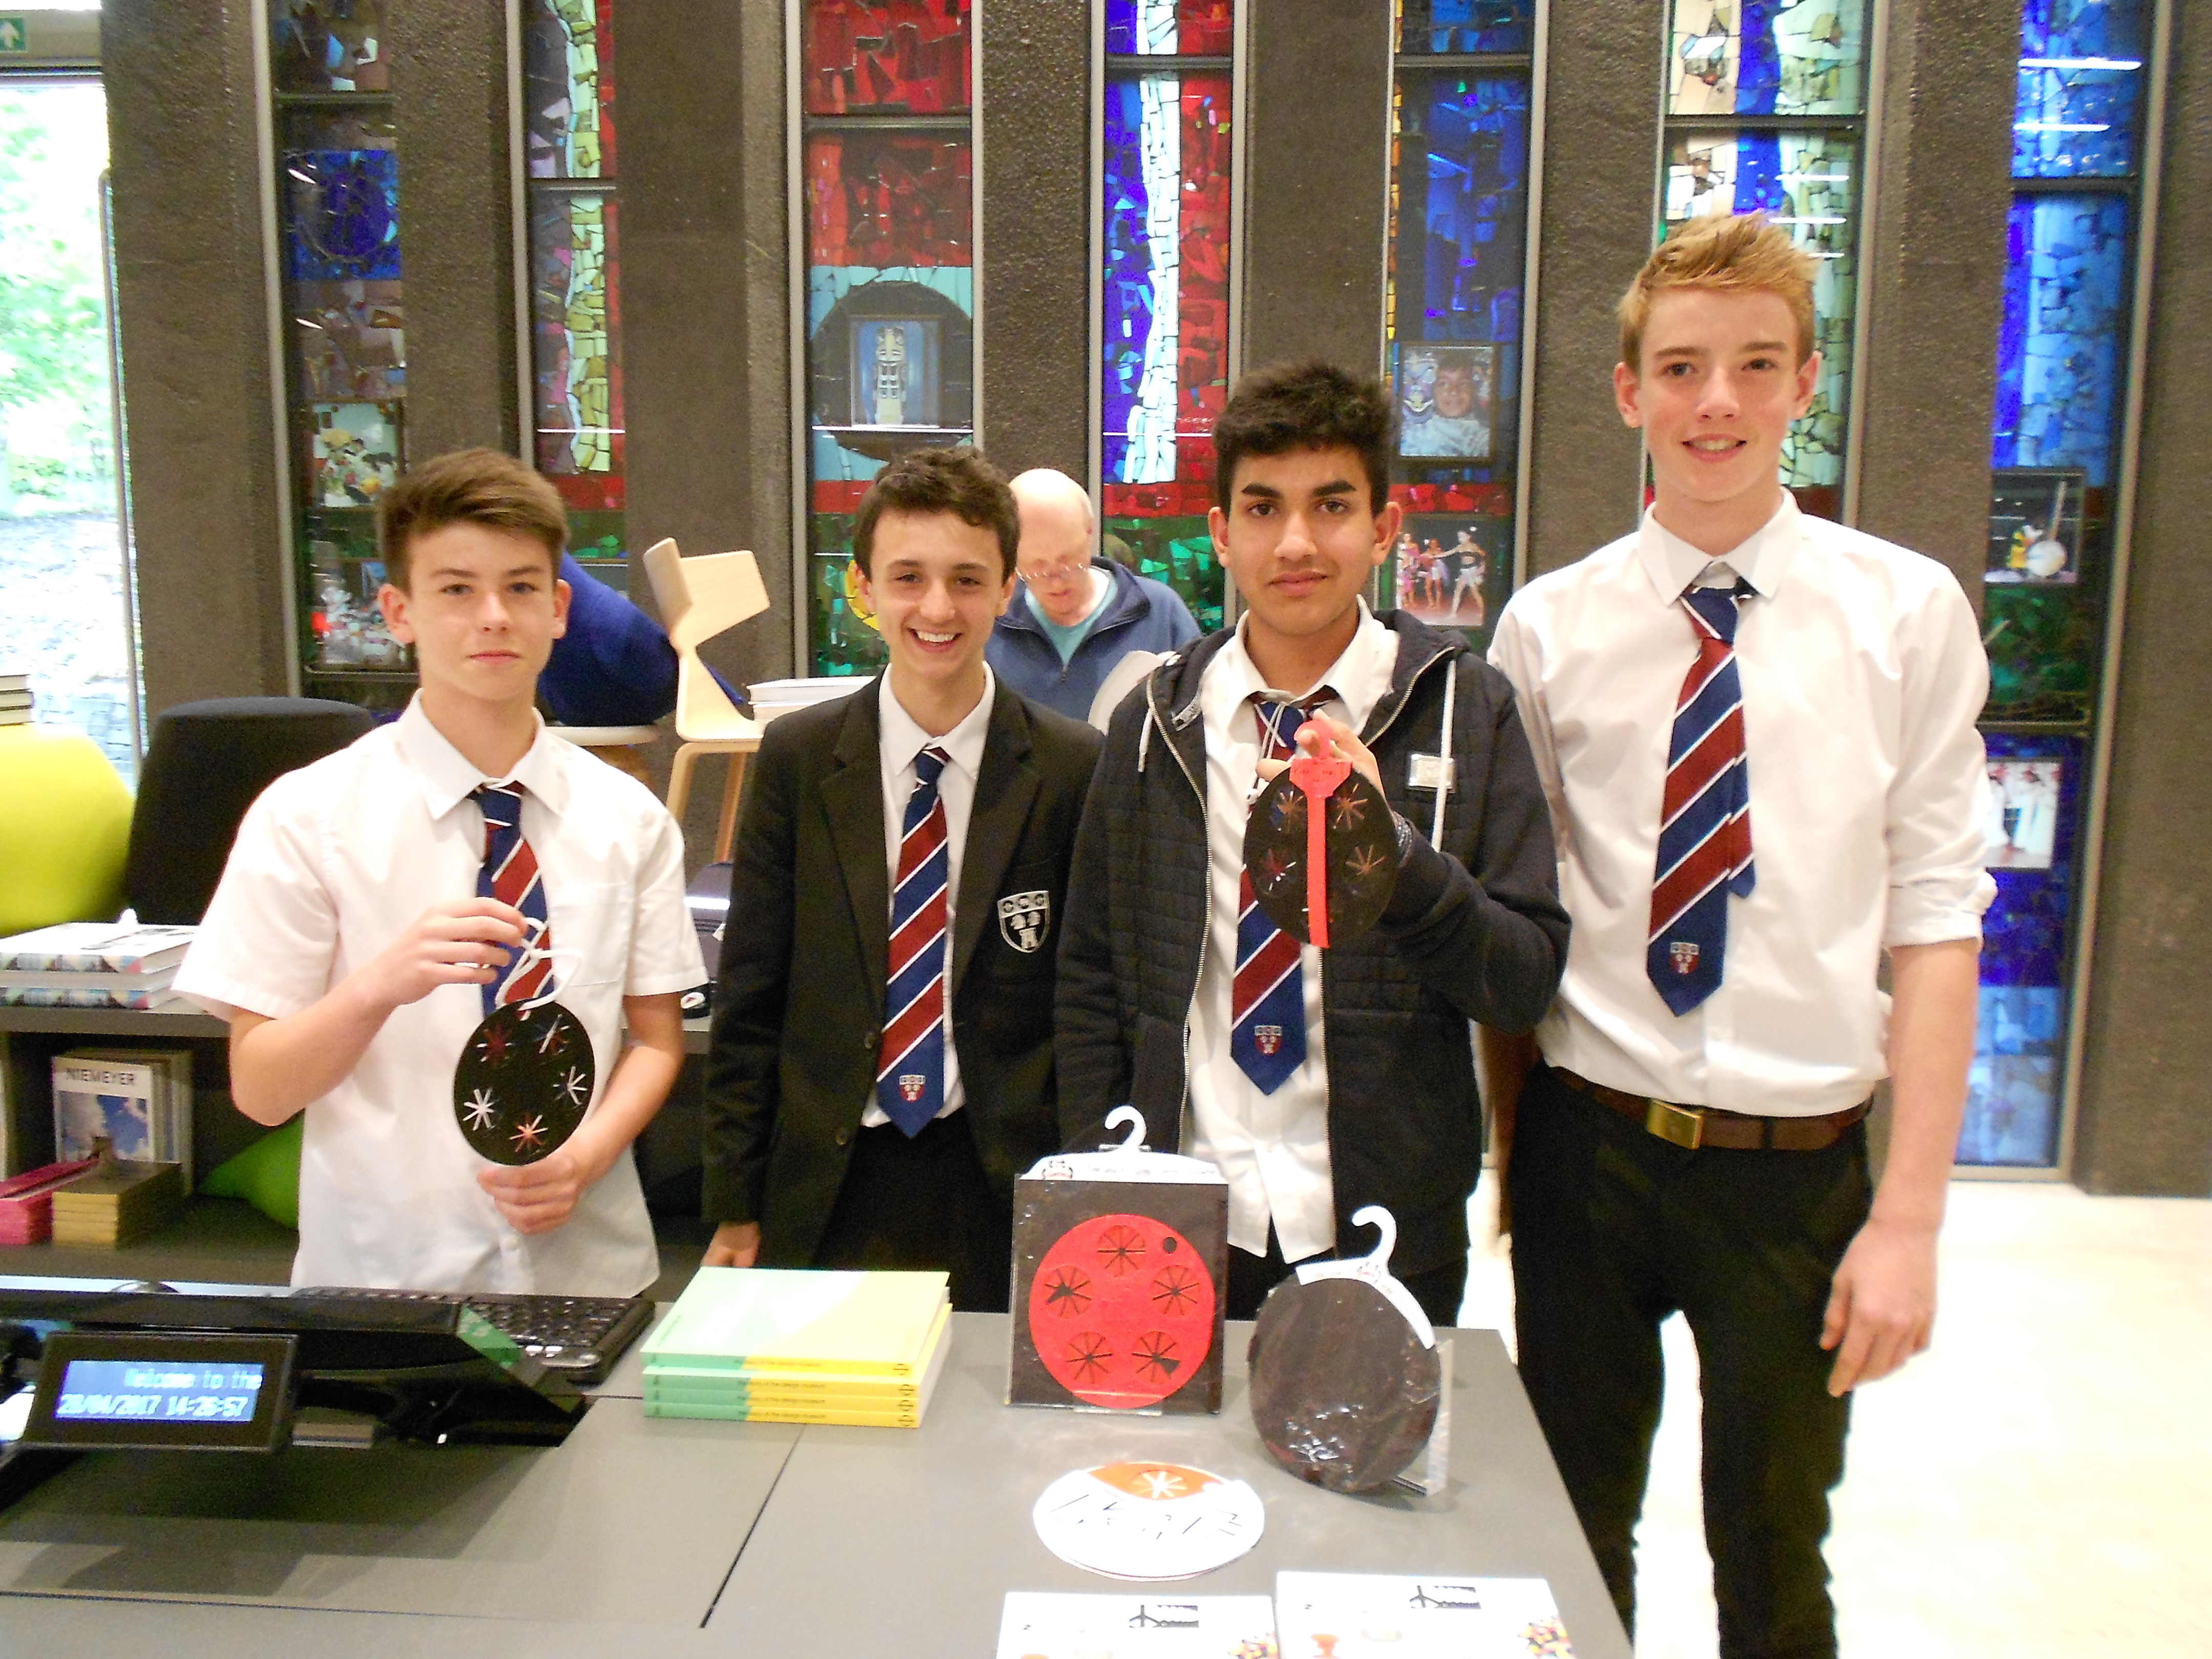
The team from Royal Grammar School, in Newcastle came up with a fantastic product ‘Kit Control’, a visual checklist tool enabling the user to physically and mentally check off items of sporting clothing as they pack their sports bag. We’ve all been there and forgotten that important piece of sports kit so I think the idea is really great!
I presented my research and previous sport related projects then worked with the students to develop ‘Kit Control’ branding, packaging and point of sale concepts. It was great to see all the team members (including their teachers!) get stuck in to designing logos and packaging ideas, presenting their work for critique as we went along. We eventually tested the ideas out in the Design Museum shop, gathering customer and staff feedback, and it’s fair to say the students were pretty chuffed with the responses.
Both myself and the studio do a lot of work around design education, as we love to teach and mentor to help others gain skills. Being able to work with the students was inspiring, as it always is when working with the museum’s education team. Being able to work quickly and develop ideas and concepts with young people energises my own work, and every time, the results surprise me – the students are really that good and represent a bright future for the design industry.
I’m already looking forward to working with more Design Ventura students and the Design Museum team this year.
Register to become a Design Ventura expert
See what Peta Miller, from Nash Design has to say about volunteering for Design Ventura.
-
Design Ventura Pitching Day 2016
The Ventura Team were very impressed on Monday when our top ten schools came in to pitch their products to our panel of judges. Everyone looked smart and had sent in their presentations before the day, so there was time for all the teams to have a short run-through of their pitches and to get some feedback from our volunteers.
The judges; Alice Black, Asif Khan, Chris Ruse, Michael Skapinker and Sebastian Conran had a tough job choosing which teams to award prizes to, but they have reached a decision and all the prize winners will be revealed at the Celebration Event in February.

Our judges (left to right) Asif Khan, Alice Black, Chris Ruse, Sebastian Conran and Michael Skapinker.

Our top ten teams in the auditorium before the pitches begin.

The judges deliberating over the top ten ideas.

The day ended on a very hands on activity – redesigning an Ikea lamp.

-
Working as a high performing team – some tips
A big part of your experience of Design Ventura is the opportunity to work like a professional design team. In this blog, I want to share some ideas about this to help you make the most out of this opportunity – and to set you all a challenge to be a really high performing team.
What is a high performing team?
Here’s a simple picture describing some of the features of a high performing team.
Clear sense of purpose:
Be clear on why the team exists and what you are there to achieve as well as how you are going to work together. In the team I am currently in, we have a motto or logo: One team, one dream. It’s a way of pulling us all together. Maybe create one for your team to help build that sense of common purpose?Clear about roles:
You’ve been asked to pick roles in the team. What’s really important here is that everyone knows what their role is and that you all trust each other to get on with that role. It might be nice to share the roll of team leader role to give everyone the opportunity and experience of doing this.Get the job done:
High performing teams keep going and help each other out.
This is about turning up on time, pulling your weight even when the going gets tough. You will have good times and bad times to work through.Value differences:
This is my favourite part of being in a team – learning to work with other people. Be open to the skills others bring to the team and don’t be afraid to be yourself.Final take away: Team Reflection Time
A couple of simple questions to use at the end of every working session together:- What’s going well?
- What could we be better at?
Don’t let things go on for too long if it isn’t working well – it’s up to everyone on the team to take responsibility to say if something isn’t working or could be improved. Put the team first, invest your energy in making the team be the best it can be.
In the words of Steve Jobs, Apple’s extraordinary founder, “the journey really is the reward.” Make the most out of working with your team mates, take something away from every session you have, show up, contribute, share, be the best team mate you can be– and really enjoy it, something magical can really happen when you are part of a high performing team.
If you want to go fast, go alone. If you want to go far, go together.
– African proverbWritten by Siobhan McKavanagh, Organisation Design Specialist, Risk Division – Deutsche Bank
-
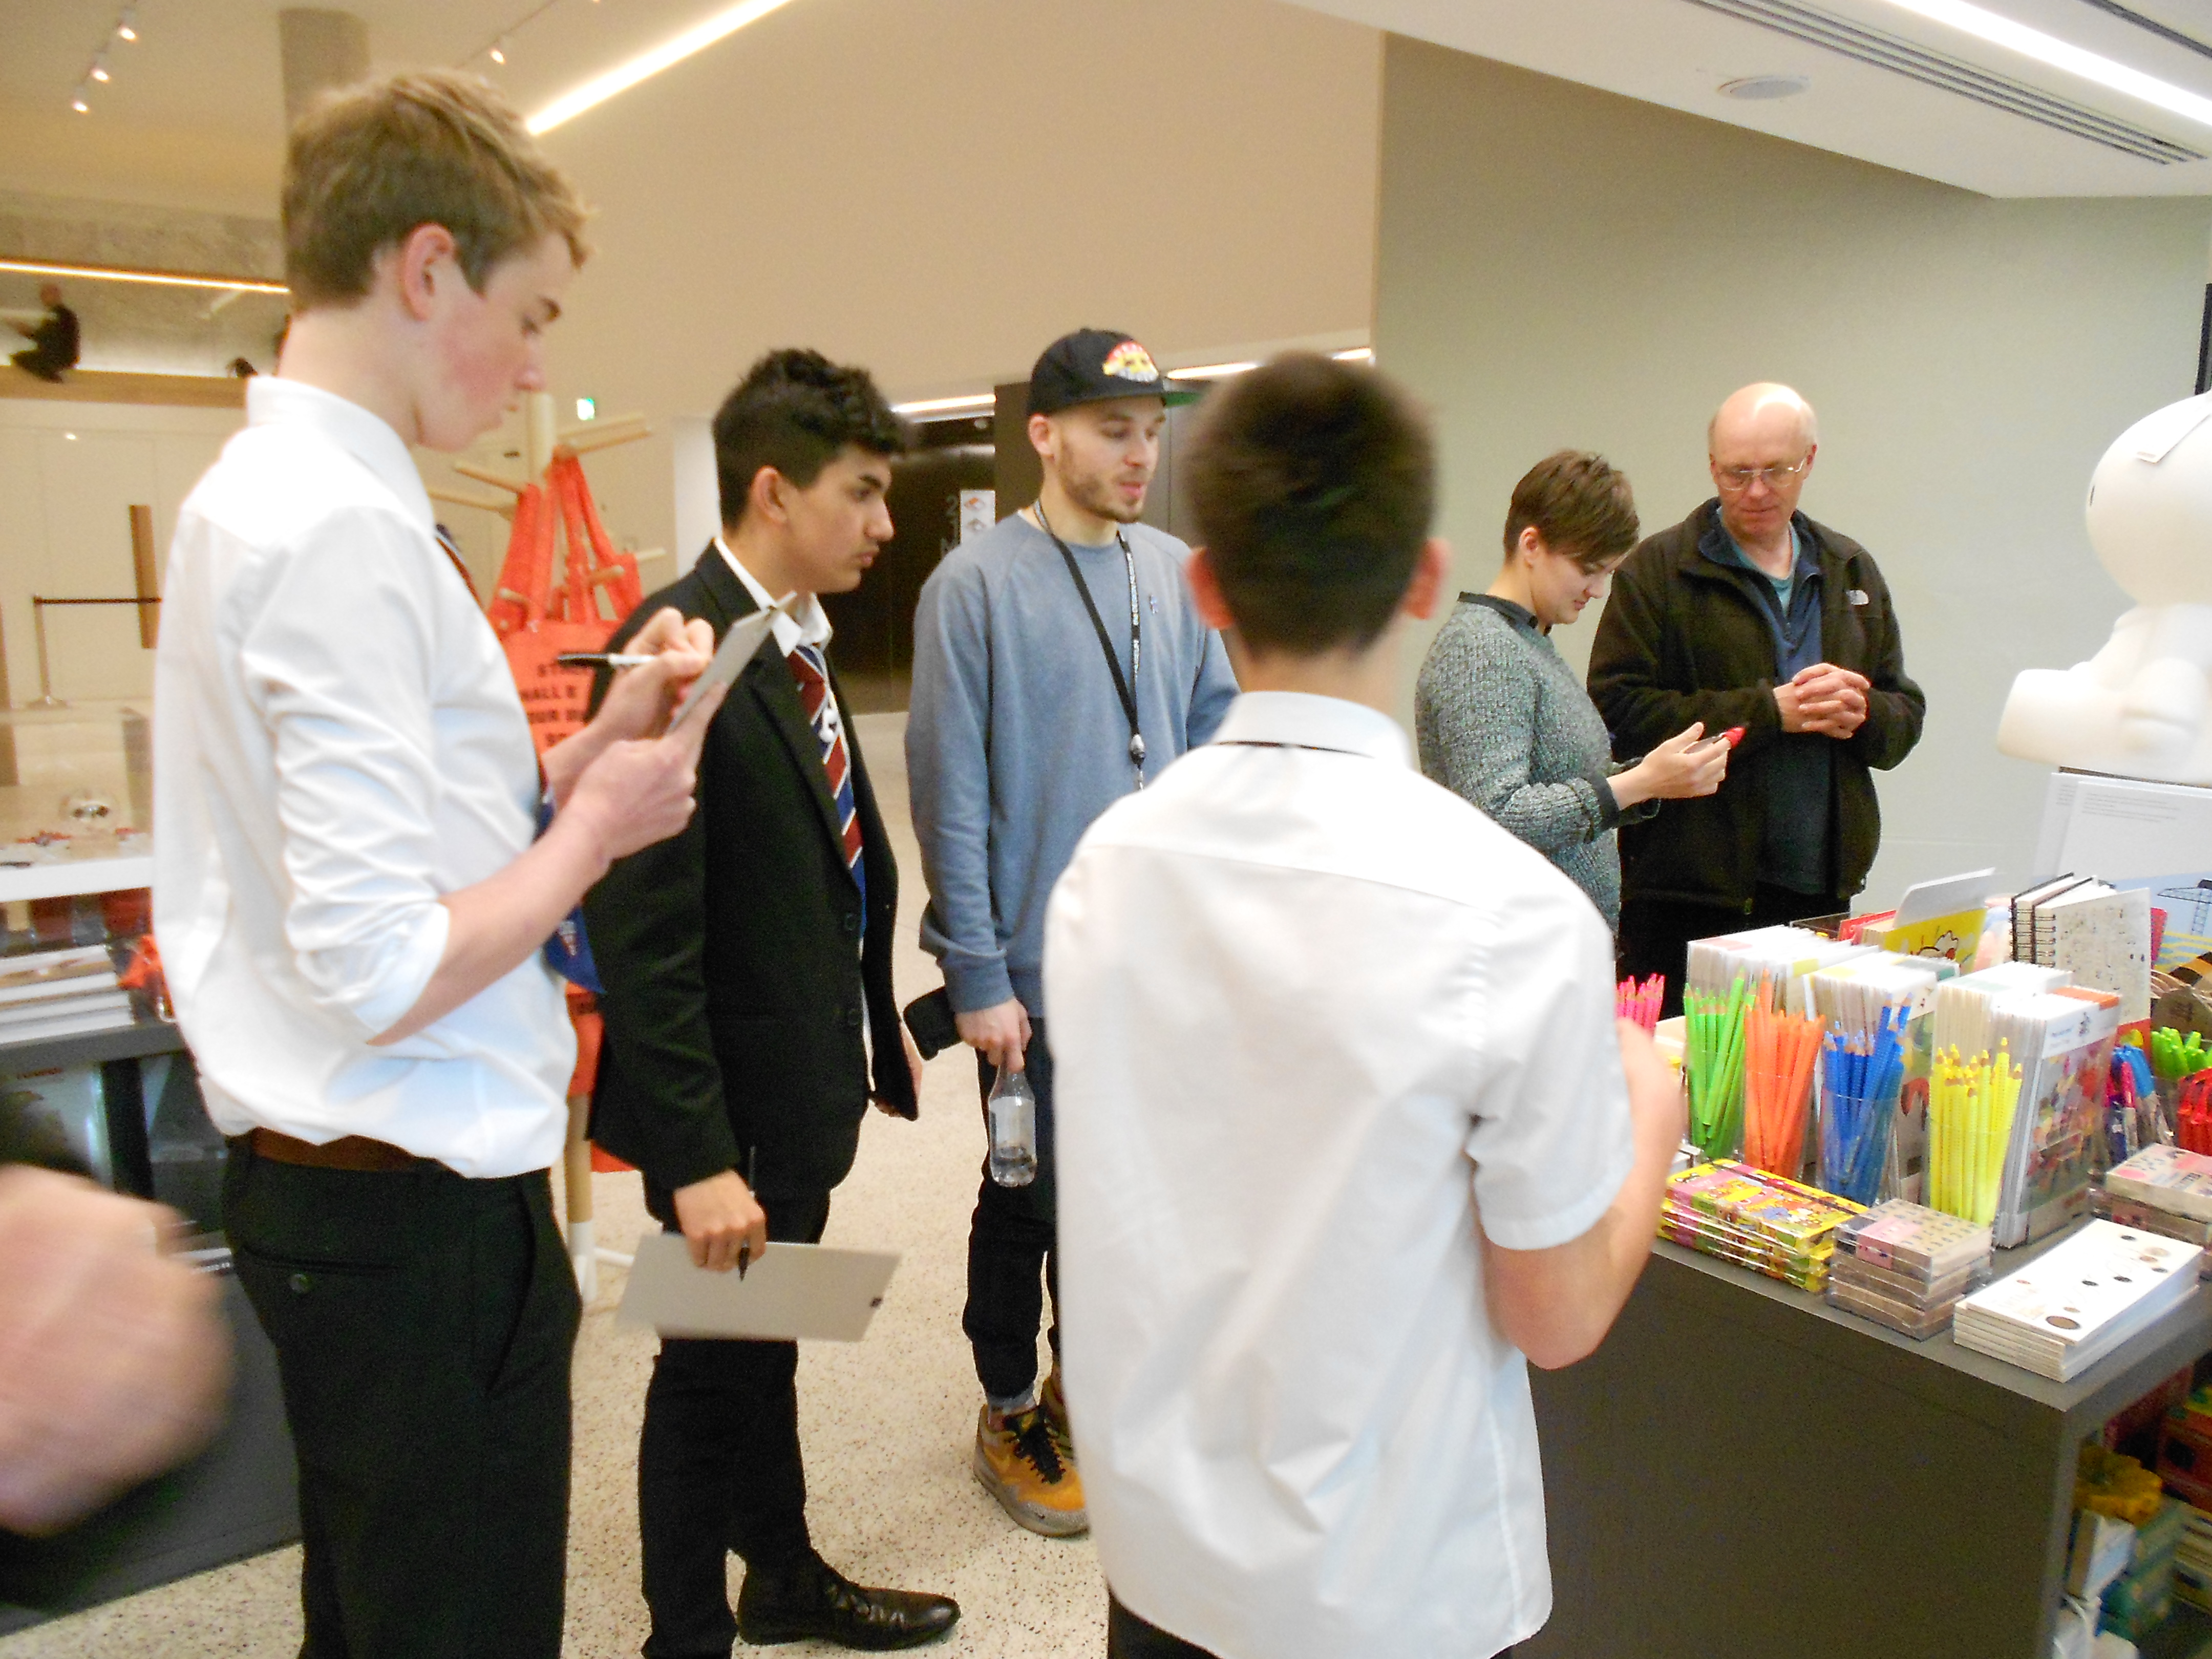
Research and Initial Ideas begin at Mill Hill School
Alexandros Theodorou, Cassius Maxwell, Sam de Leval & Hugo Mutkins started their research and initial ideas stage yesterday evening. As a team they will be working after school on Thursdays and Saturday mornings! (school timetabled I’m afraid). Great research carried out already and some thought provoking initial ideas. Trying to keep it simple is key at the moment.
Will keep you all posted with progress.
Best wishes
Chris Mckay at Mill Hill School

